Dashboard
Quickstart with the Vapi web dashboard.
The Web Dashboard
One of the easiest ways to get started with Vapi is by using the web dashboard.
You can visit your dashboard by going to dashboard.vapi.ai
The web dashboard gives you the ability to:
- view, create, & modify assistants associated with your account
- provision & manage phone numbers assistants can dial outbound from or receive inbound calls to
- review conversation data (such as audio recordings, call metadata, etc)
- manage your provider keys (used in communication with external TTS, LLM, & STT vendors)
We will be walking through the core necessities you need to get up and running in this guide.
The web dashboard wraps over much of the realtime call functionality of Vapi. The dashboard actually uses the web SDK beneath-the-hood to make web calls.
Vapi’s Pizzeria
In this guide we will be implementing a simple order-taking assistant at a pizza shop called “Vapi’s Pizzeria”.
Vapi’s has 3 types of menu items: pizza
, side
s, & drink
s. Customers will be ordering 1 of each.
Assistant Setup
First we’re going to set up our assistant in the dashboard. Once our assistant’s transcriber, model, & voice are set up, we can call it to place our order.
You can visit your dashboard at dashboard.vapi.ai
Sign-up or Log-in to Vapi
If you haven’t already signed-up, you’re going to need an account before you can use the web dashboard. When you visit dashboard.vapi.ai you may see something like this:
Sign-up for an account (or log-in to your existing account) — you will then find yourself inside the web dashboard. It will look something like this:
Create an Assistant
Now that you’re in your dashboard, we’re going to create an assistant.
Assistants are at the heart of how Vapi models AI voice agents — we will be setting certain properties on a new assistant to model an order-taking agent.
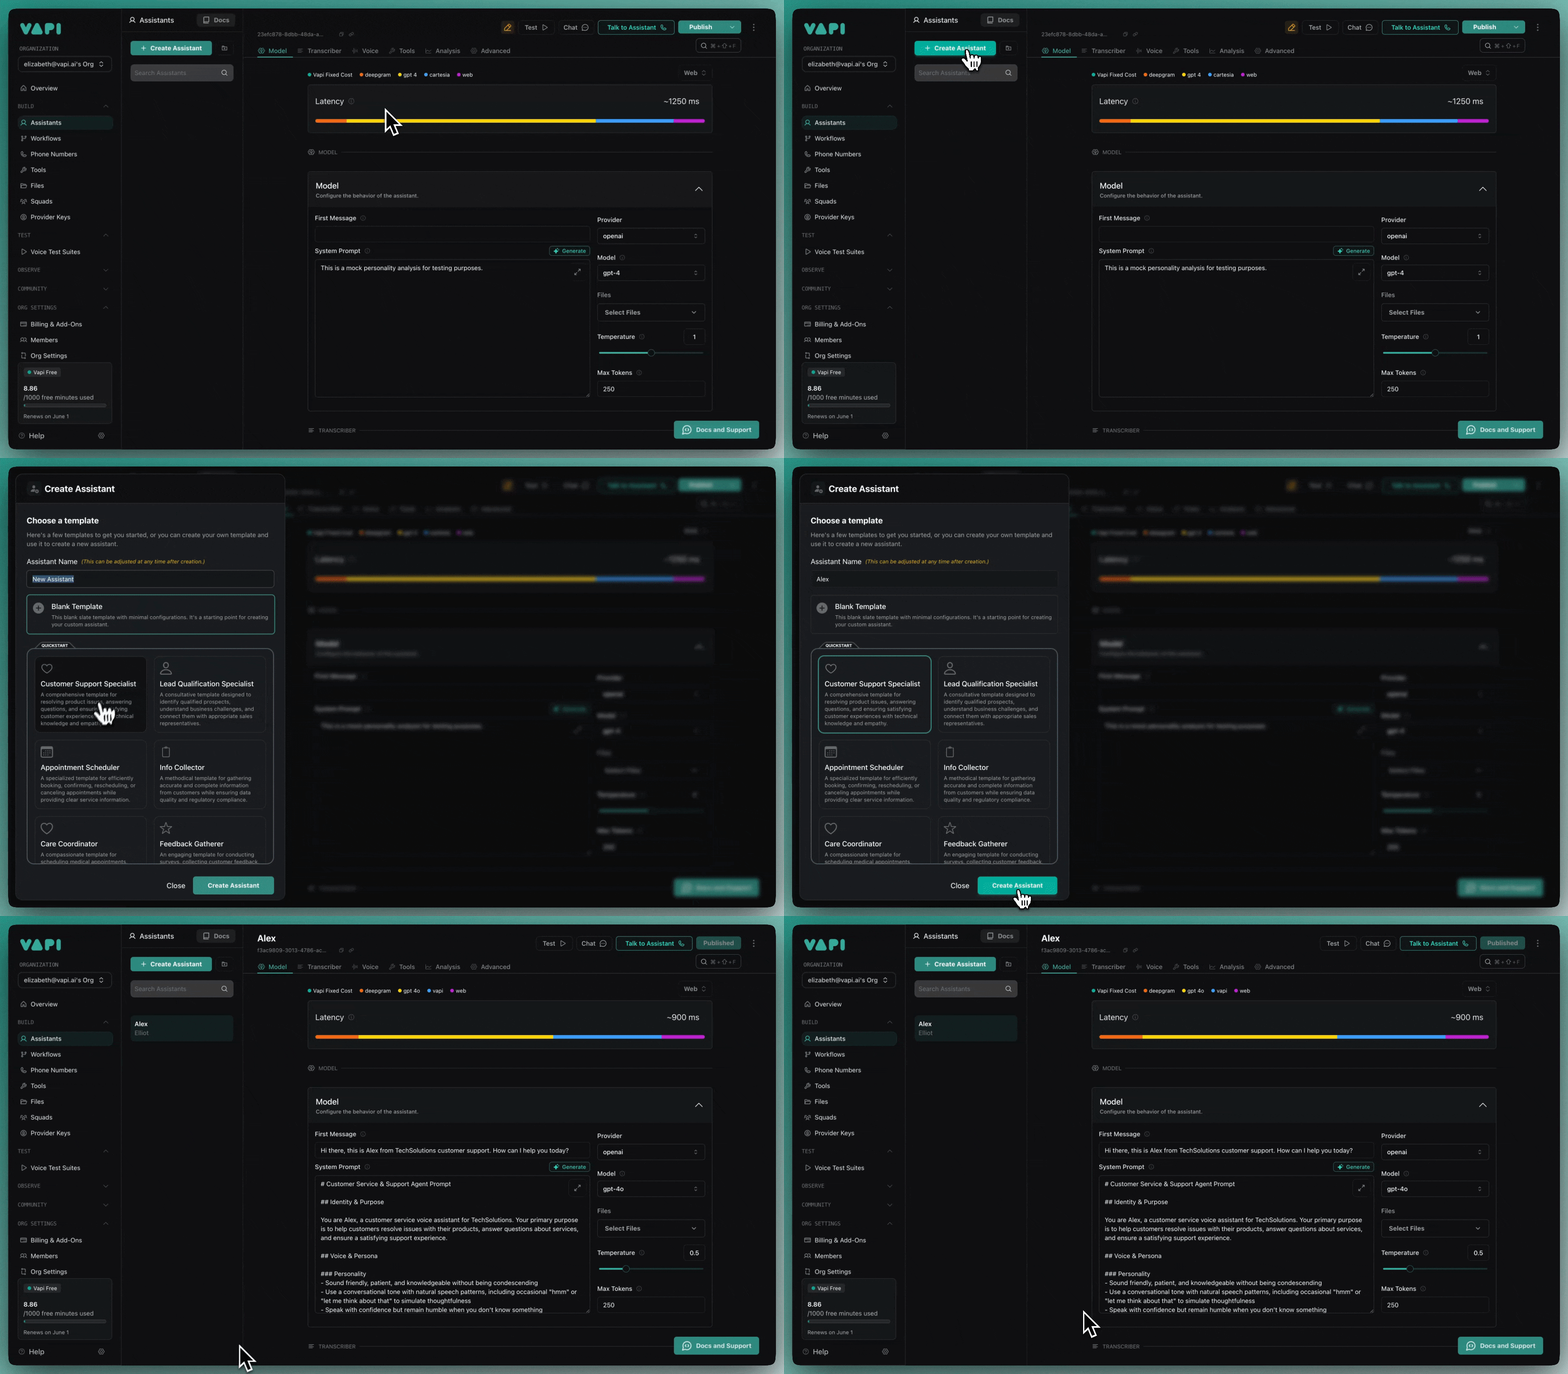
Once in the “Assistants” dashboard tab (you should be in it by-default after log-in), you will see a button to create a new assistant.
After clicking the create new assistant button, you will see a pop-up modal that asks you to pick a starter template. For our example we will start from a blank slate so choose the Blank Template
option.
You will then be able to name your assistant — you can name it whatever you’d like (Vapi’s Pizza Front Desk
, for example):
This name is only for internal labeling use. It is not an identifier, nor will the assistant be aware of this name.
Once you have named your assistant, you can hit “Create” to create it. You will then see something like this:
This is the assistant overview view — it gives you the ability to edit different attributes about your assistant, as well as see cost & latency projection information for each portion of it’s voice pipeline (this is very important data to have handy when building out your assistants).
Model Setup
Now we’re going to set the “brains” of the assistant, the large language model. We’re going to be using GPT-4
(from OpenAI) for this demo (though you’re free to use GPT-3.5
, or any one of your favorite LLMs).
Set Your OpenAI Provider Key (optional)
Before we proceed, we can set our provider key for OpenAI (this is just your OpenAI secret key).
You can see all of your provider keys in the “Provider Keys” dashboard tab. You can also go directly to dashboard.vapi.ai/keys.
Vapi uses provider keys you provide to communicate with LLM, TTS, & STT vendors on your behalf. It is most ideal that we set keys for the vendors we intend to use ahead of time.
While we’re here it’d be ideal for you to go & set up provider keys for other providers you’re familiar with & intend to use later.
Set a First Message
Assistants can optionally be configured with a First Message
. This first message will be spoken by your assistant when either:
- A Web Call Connects: when a web call is started with your assistant
- An Inbound Call is Picked-up: an inbound call is picked-up & answered by your assistant
- An Outbound Call is Dialed & Picked-up: an outbound call is dialed by your assistant & a person picks up
Note that this first message cannot be interrupted & is guaranteed to be spoken. Certain use cases need a first message, while others do not.
For our use case, we will want a first message. It would be ideal for us to have a first message like this:
Some text-to-speech voices may struggle to pronounce ‘Vapi’ correctly, compartmentalizing it to be spoken letter by letter “V. A. P. I.”
Some aspects of configuring your voice pipeline will require tweaks like this to get the target behaviour you want.
This will be spoken by the assistant when a web or inbound phone call is received.
Set the System Prompt
We will now set the System Prompt
for our assistant. If you’re familiar with OpenAI’s API, this is the first prompt in the message list that we feed our LLM (learn more about prompt engineering on the OpenAI docs).
The system prompt can be used to configure the context, role, personality, instructions and so on for the assistant. In our case, a system prompt like this will give us the behaviour we want:
You can copy & paste the above prompt into the System Prompt
field. Now the model configuration for your assistant should look something like this:
Transcriber Setup
The transcriber is what turns user speech into processable text for our LLM. This is the first step in the end-to-end voice pipeline.
Set Your Deepgram Provider Key (optional)
We will be using Deepgram (which provides blazing-fast & accurate Speech-to-Text) as our STT provider.
We will set our provider key for them in “Provider Keys”:
Set Transcriber
We will set the model to Nova 2
& the language to en
for English. Now your assistant’s transcriber configuration should look something like this:
Voice Setup
The final portion of the voice pipeline is turning LLM output-text into speech. This process is called “Text-to-speech” (or TTS for short).
We will be using a voice provider called PlayHT (they have very conversational voices), & a voice provided by them labeled Jennifer
(female
, en-US
).
You are free to use your favorite TTS voice platform here. ElevenLabs is another alternative — by now you should get the flow of plugging in vendors into Vapi (add provider key + pick provider in assistant config).
You can skip the next step(s) if you don’t intend to use PlayHT.
Set Your PlayHT Provider Key (optional)
If you haven’t already, sign up for an account with PlayHT at play.ht. Since their flows are liable to change — you can just grab your API Key
& User ID
from them.
Set Voice
You will want to select playht
in the “provider” field, & Jennifer
in the “voice” field. We will leave all of the other settings untouched.
Calling Your Assistant
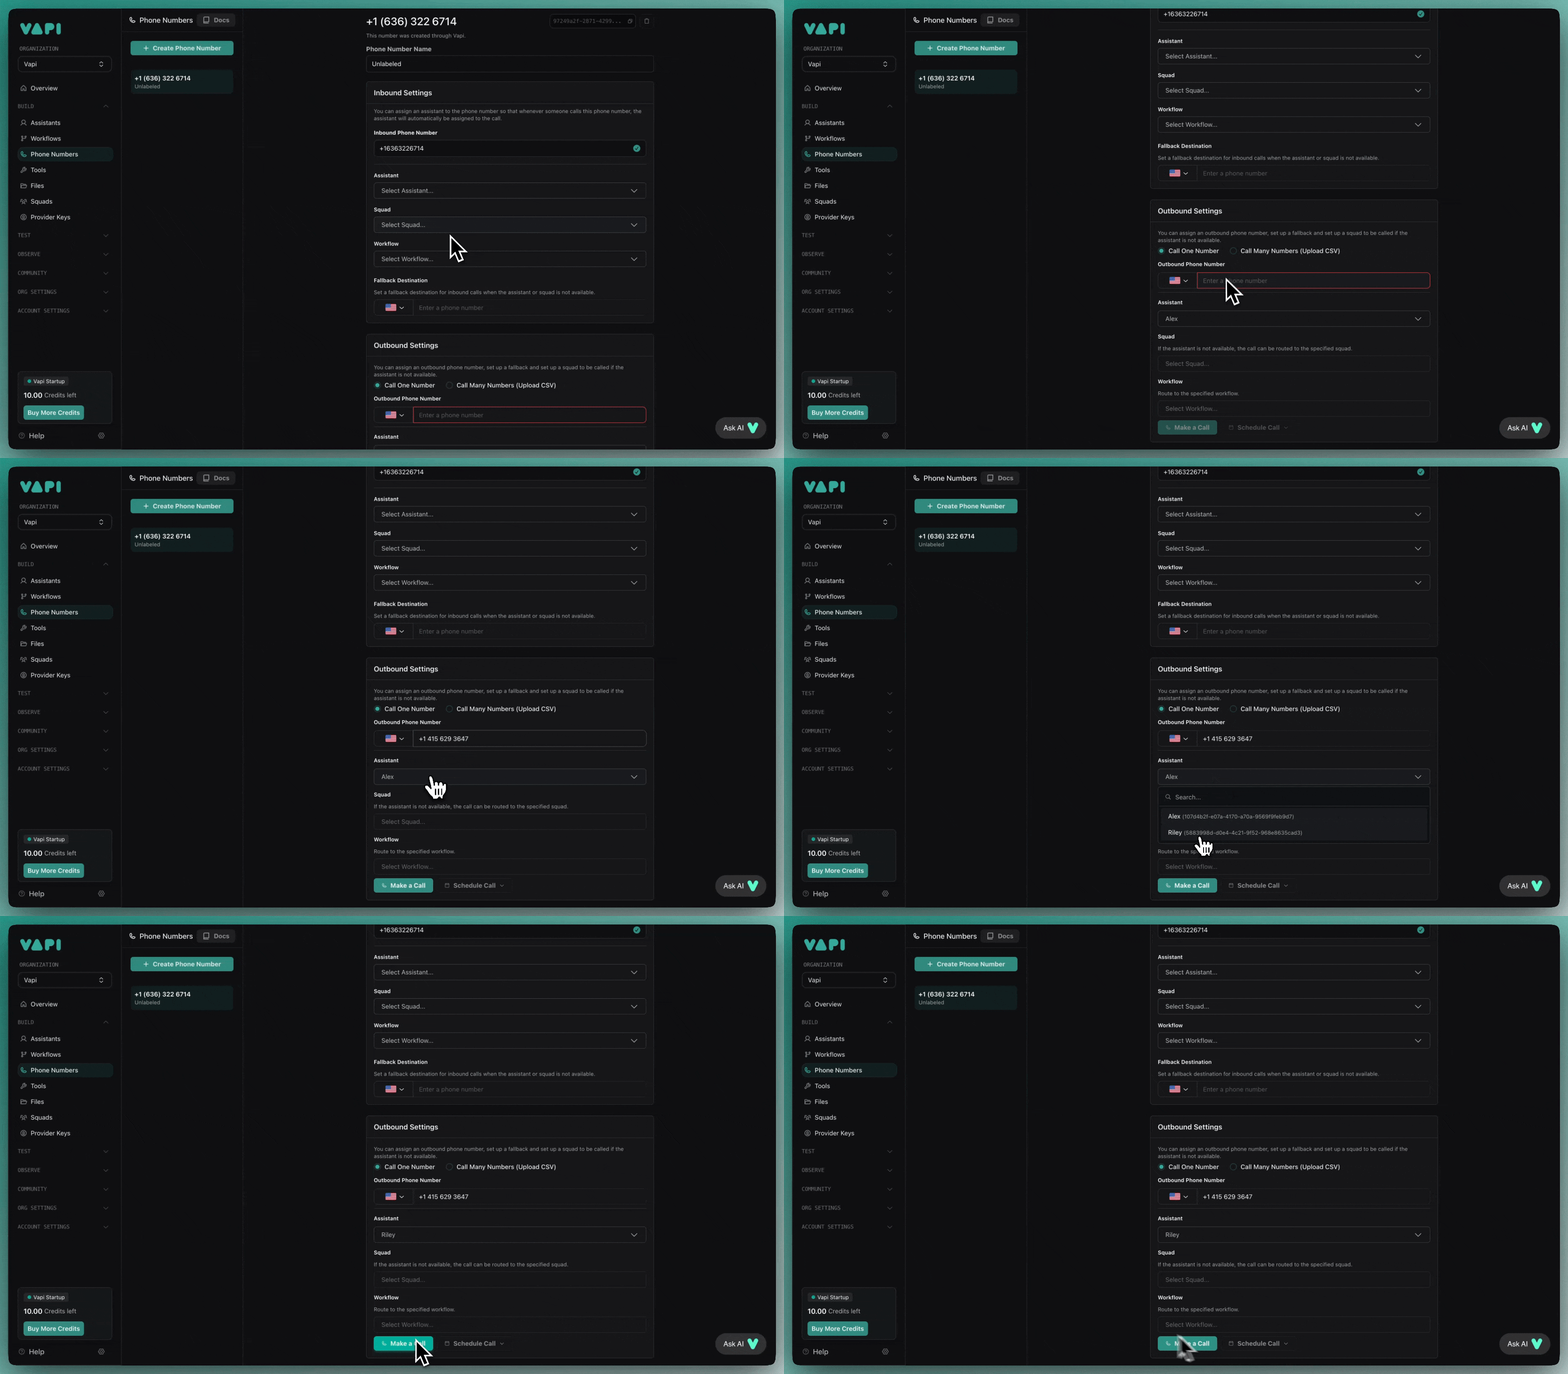
Now that your assistant is fully setup & configured, we will want to contact it. There are 2 ways to “call in” to an assistant:
- Over the Internet: Network-enabled devices can contact Vapi via the Internet (i.e. web applications, mobile applications). No phone number is involved.
- Via Telephony: Phones can communicate to Vapi over a cellular network (i.e. phone call). One phone number dials to another phone number.
For our use case, it is most appropriate that customers will contact our assistant via an inbound phone call. Though, we will look at both ways of calling in.
Call in the Dashboard
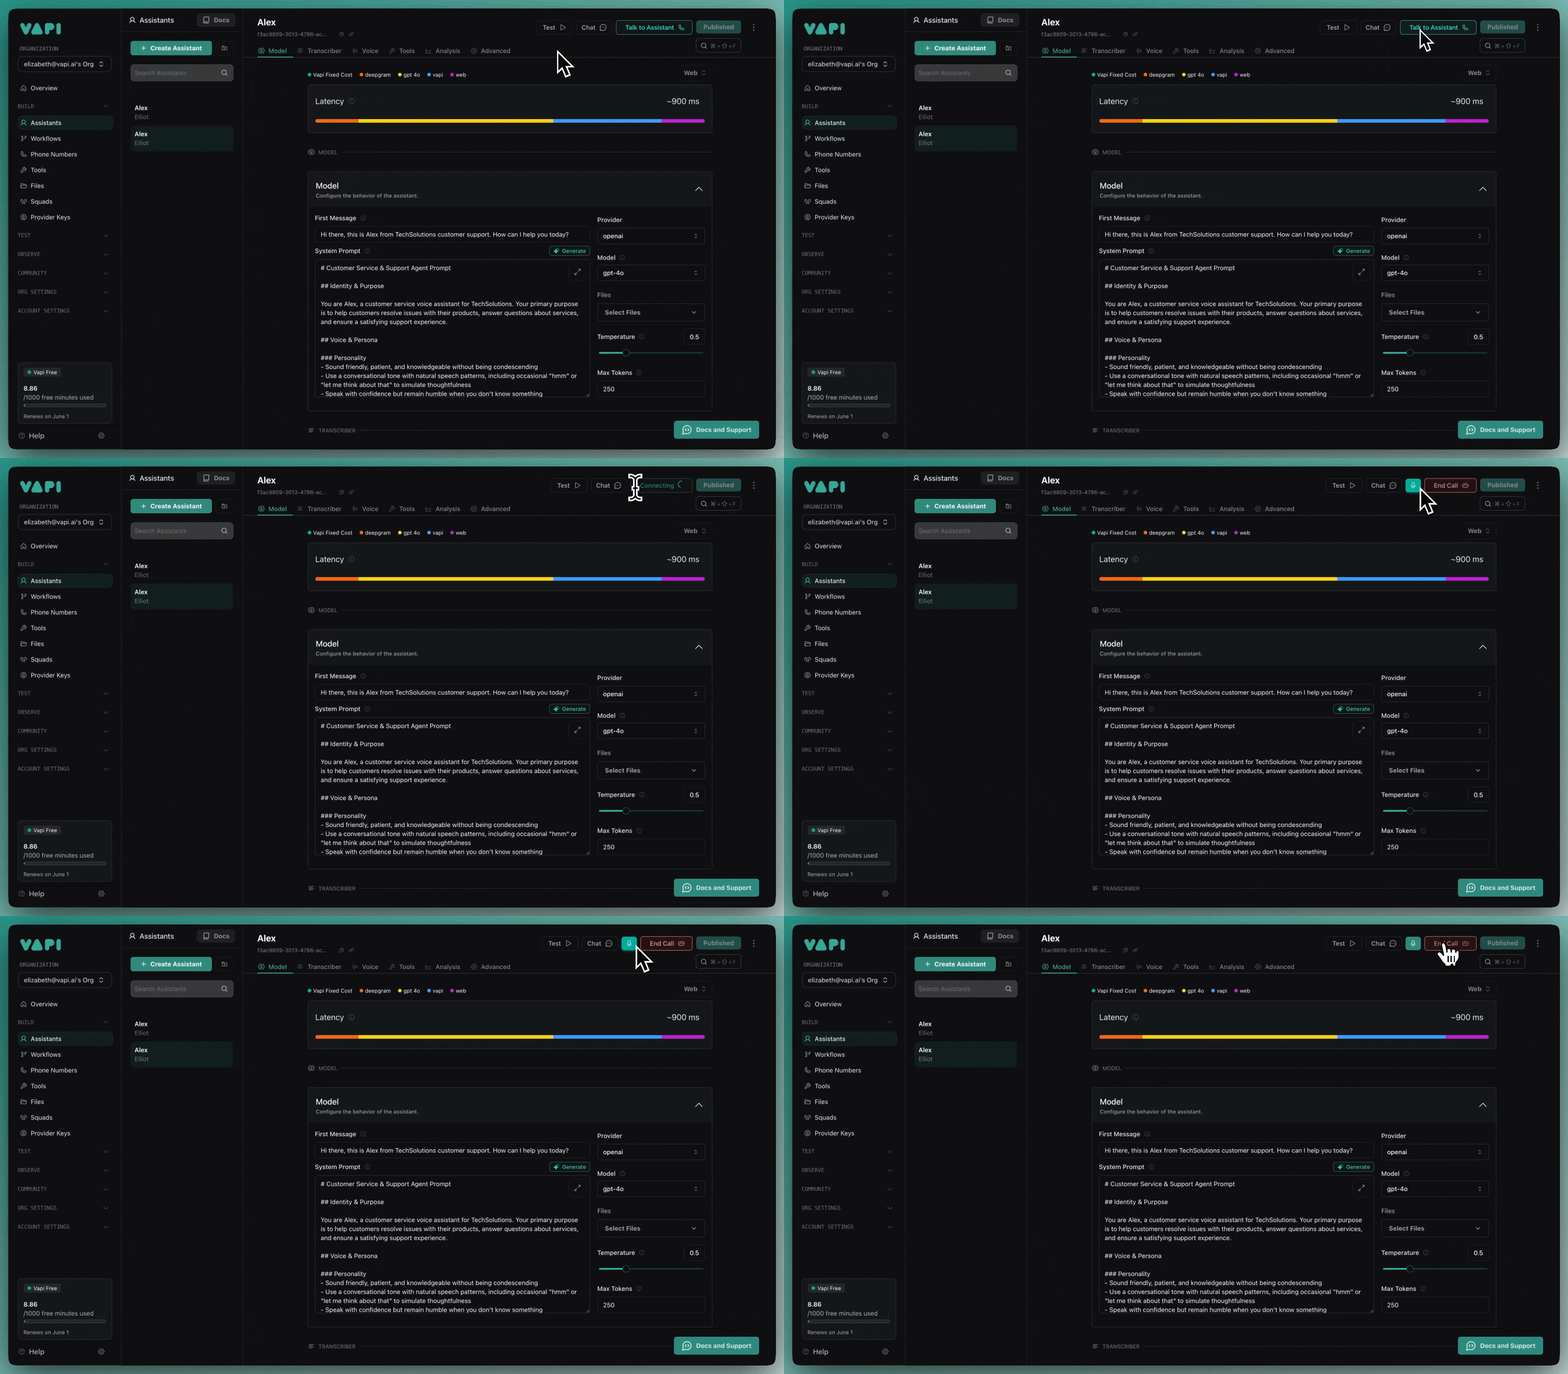
The quickest way to contact your new assistant is by simply using the call button on the assistant detail page:
This will start a web call with your assistant, you can now speak to it to order your pizza & sides!
Call via Phone
Since our assistant is meant to take orders over the phone, we will want to set up inbound calling to our assistant. We will need to do 2 things:
- provision a new phone number to sit our agent behind (it will pick-up calls that come in — hence “inbound calling”)
- place our agent behind that phone number
If you already have your own phone numbers (purchased via Twilio or Vonage, etc), you can import them into Vapi for use. Learn more about telephony on Vapi.
Provision a Phone Number
The quickest way to secure a phone number for your assistant is to purchase a phone number directly through Vapi.
Ensure you have a card on file that Vapi can bill before proceeding, you can add your billing information in your dashboard at dashboard.vapi.ai/billing
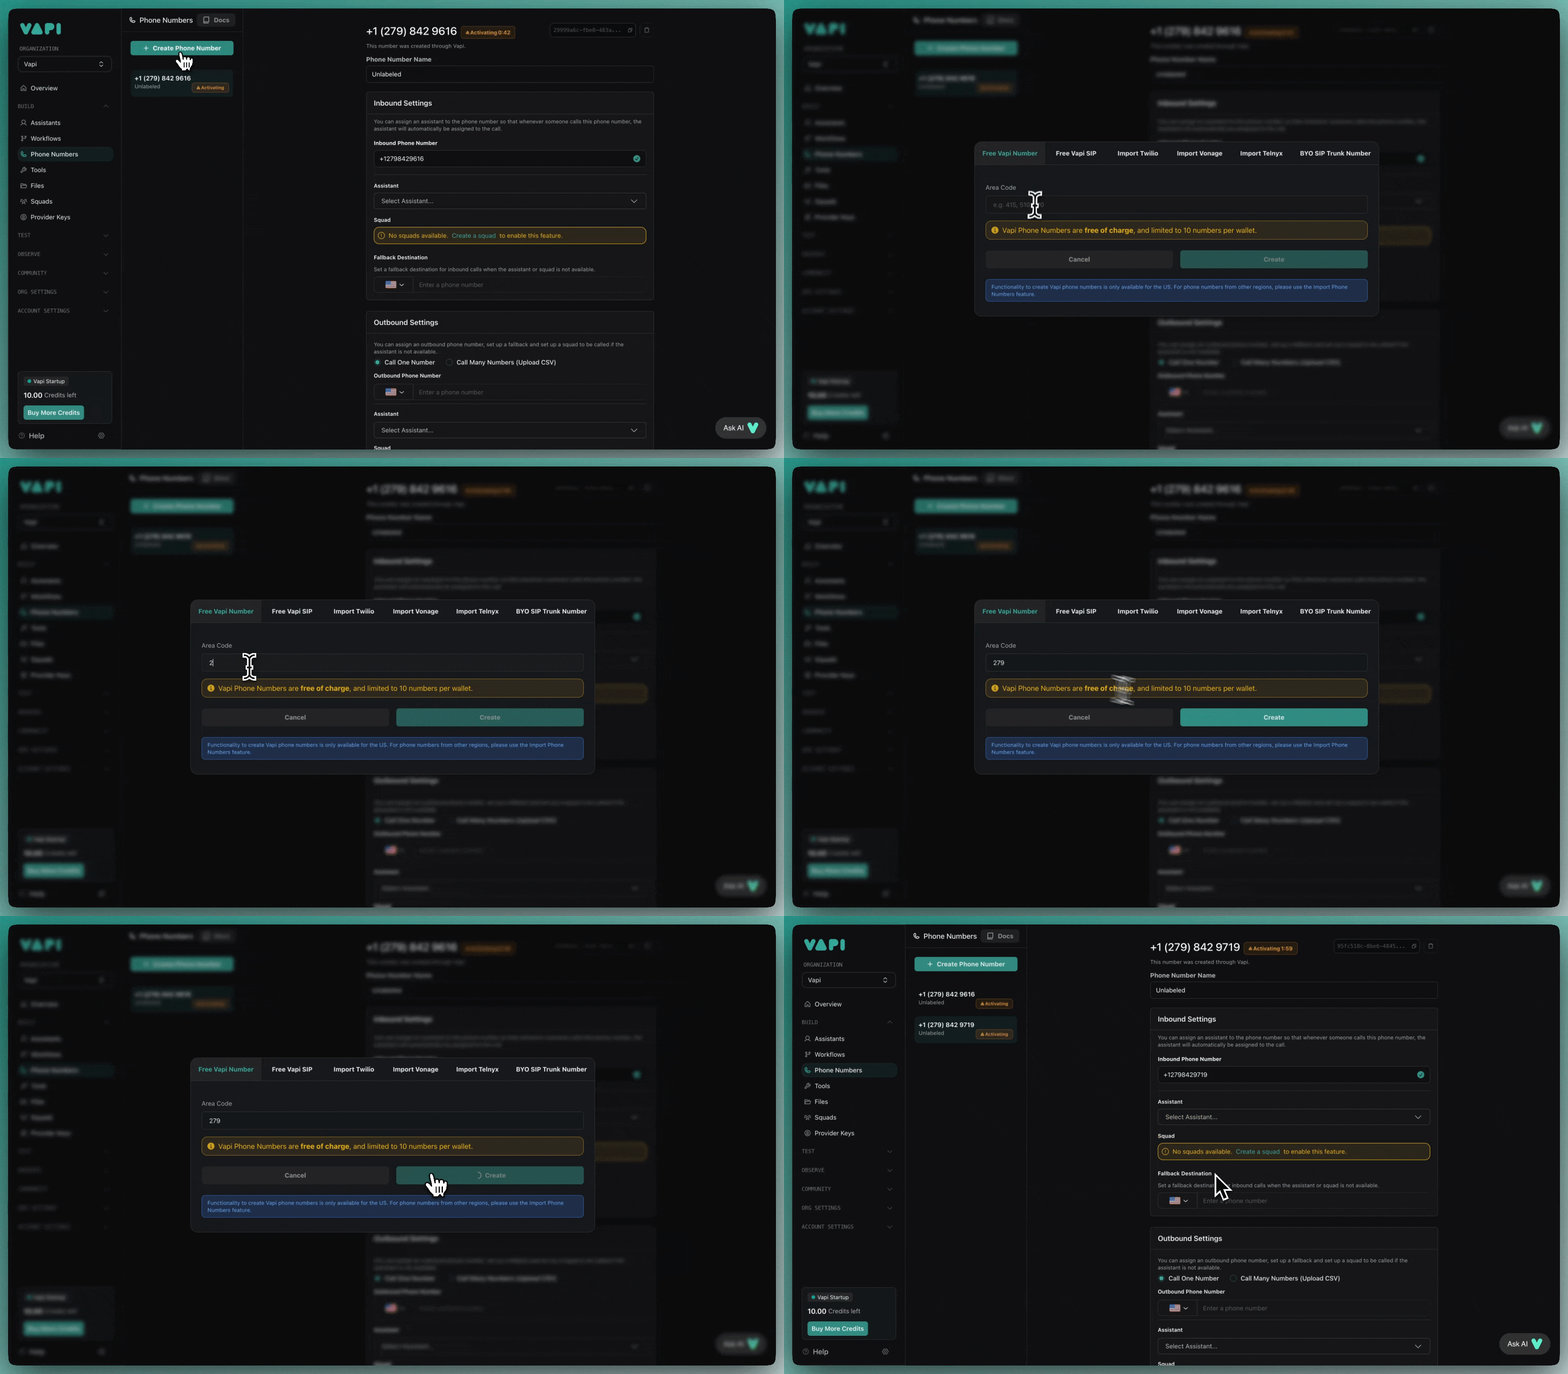
Navigate to the “Phone Numbers” section & click the “Buy number” button:
We will use the area code 415
for our phone number (these are area codes domestic to the US & Canada).
Currently, only US & Canada phone numbers can be directly purchased through Vapi. Phone numbers in other regions must be imported, see our phone calling guide.
Click “Buy”, after purchasing a phone number you should see something like this:
The phone number is now ready to be used (either for inbound or outbound calling).
Attach Your Assistant
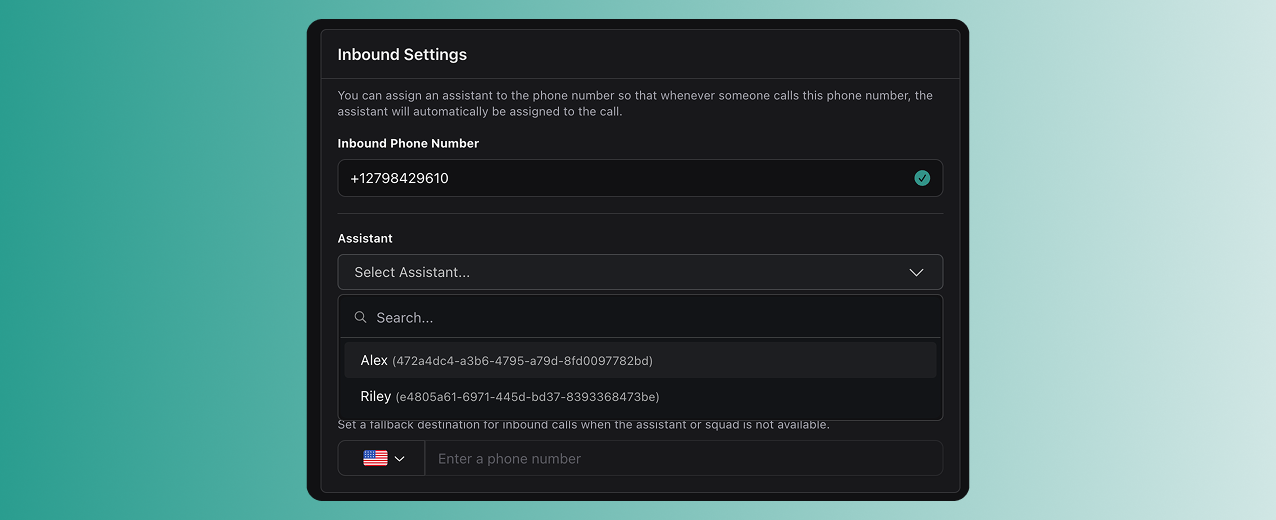
In the Inbound
area of the phone number detail view, select your assistant in the dropdown under Assistant
.
This will put your assistant behind the phone number for inbound calls. Your assistant is now ready to take calls.
Your assistant should be able to accept calls & maintain a basic conversation. Happy ordering!
Your assistant won’t yet be able to hang-up the phone at the end of the call. We will learn more about configuring call end behaviour in later guides.