

Campaigns quickstart
In about 10 minutes, you’ll create a campaign that calls two fictional customers with a personalized appointment reminder. After launch, you’ll monitor the campaign and open the result for each contact.
What you’ll build
A campaign that uses one assistant to call two contacts. The uploaded CSV supplies each contact’s name and appointment date as dynamic variables.
Prerequisites
- A Vapi account
- An assistant configured to handle the calls
- An outbound-capable phone number that appears in the campaign’s Phone Number list
Vapi Free Numbers cannot be used to launch campaigns.
Prepare the assistant
Create an assistant that greets each contact by name and delivers the reminder. Both flows use the same system prompt.
Dashboard
cURL
Create the assistant
In the Vapi Dashboard, go to Assistants and select Create Assistant. Give it a name, such as Appointment reminders.
Campaign calls can reach voicemail or a phone’s automated call screener. Before calling a large audience, configure the assistant to handle voicemail and call screening.
Create and launch the campaign
Dashboard
cURL
Configure campaign details
Enter Appointment reminders as the Campaign name. Under Phone Number, select the number that should place the calls.
Under Who makes the calls, select Assistant, then choose the assistant you prepared. Keep Max concurrency at a value within your subscription’s available capacity.
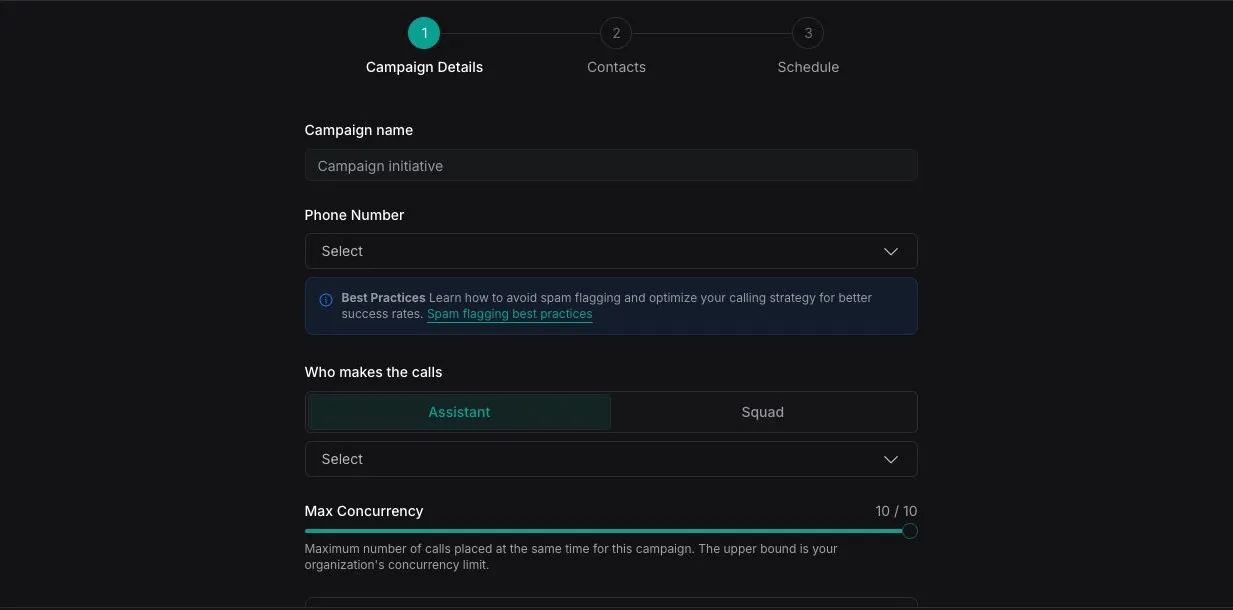
Leave Webhook settings (optional) collapsed for this quickstart. Use it when your server needs campaign events or a pre-dial eligibility check.
Create the contact CSV
Save the following example as appointment-reminders.csv:
Replace both reserved example numbers with numbers that you have permission to call before launching the campaign.
Upload and review contacts
Select Next to open Contacts. Keep CSV upload selected, then upload appointment-reminders.csv.
Confirm that both contacts appear in the preview. The preview shows names and phone numbers; appointment_date is still included as a dynamic variable even though additional columns do not appear in the preview.
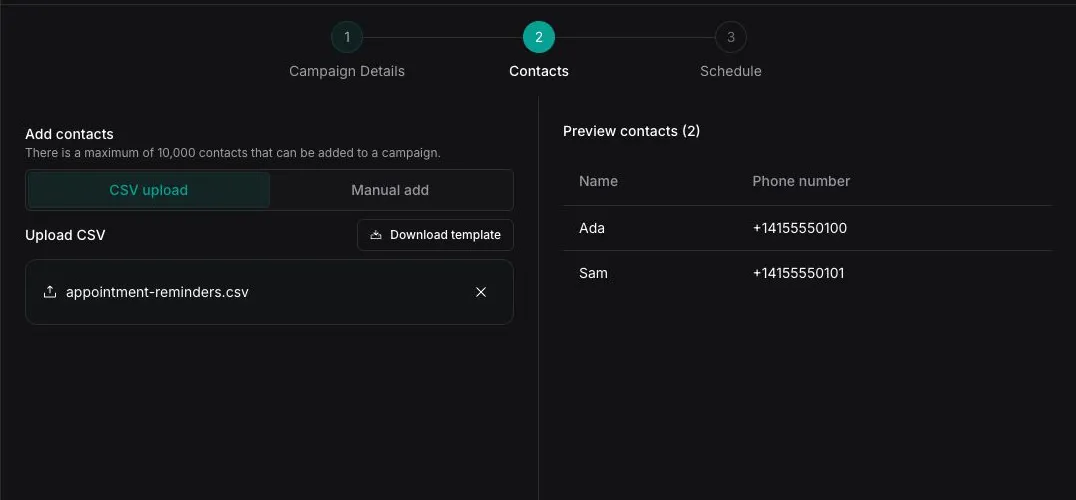
You can also select Download template to start with a sample CSV or choose Manual add to enter phone numbers and optional names without a file.
Choose the schedule
Select Next to open Schedule. Choose Send now for this quickstart.
To schedule the campaign instead, select Schedule for later, choose the time zone, and set the start and end of the calling window. Campaigns can be scheduled up to seven days in advance.
Creating the campaign either launches it immediately or schedules it. You cannot save a campaign as a draft. After you schedule a campaign, its configuration is read-only, and you can only cancel it before it runs.
Launching a campaign can place real phone calls. Replace the example contacts, verify local calling requirements, and confirm that you intend to call every uploaded number.
Launch the campaign
Review the campaign, then select Launch campaign. Vapi opens the campaign detail page and begins dispatching contacts as concurrency becomes available.
Review the results
Watch Audience, Remaining calls, Connected calls, and Pick up rate update. Use Contact status to filter the contact table.
A dialed contact includes its call ID, ended reason, start time, duration, and cost. Select the row to open the call record and review its transcript, recording, and analysis.
Understand the result
Each uploaded row becomes one campaign contact. The contact progresses from pending to a terminal result such as completed, failed, skipped, or pre-dial failed.
The campaign ends after every contact reaches a terminal result or you cancel the campaign. Canceling removes calls that have not started; calls already in progress finish normally.
After creation, the campaign is read-only: you can monitor it and review its results, but you cannot edit or rerun it. Select Duplicate campaign, review the copied configuration and contacts, and launch the duplicate as a new campaign.