Workflows quickstart
Workflows will be retired on August 18, 2026. From August 19, 2026 onward, existing workflows will no longer run. You will no longer be able to create new workflows on the dashboard. Migrate existing workflows to Assistants or Squads before the retirement date to avoid disruption.
Overview
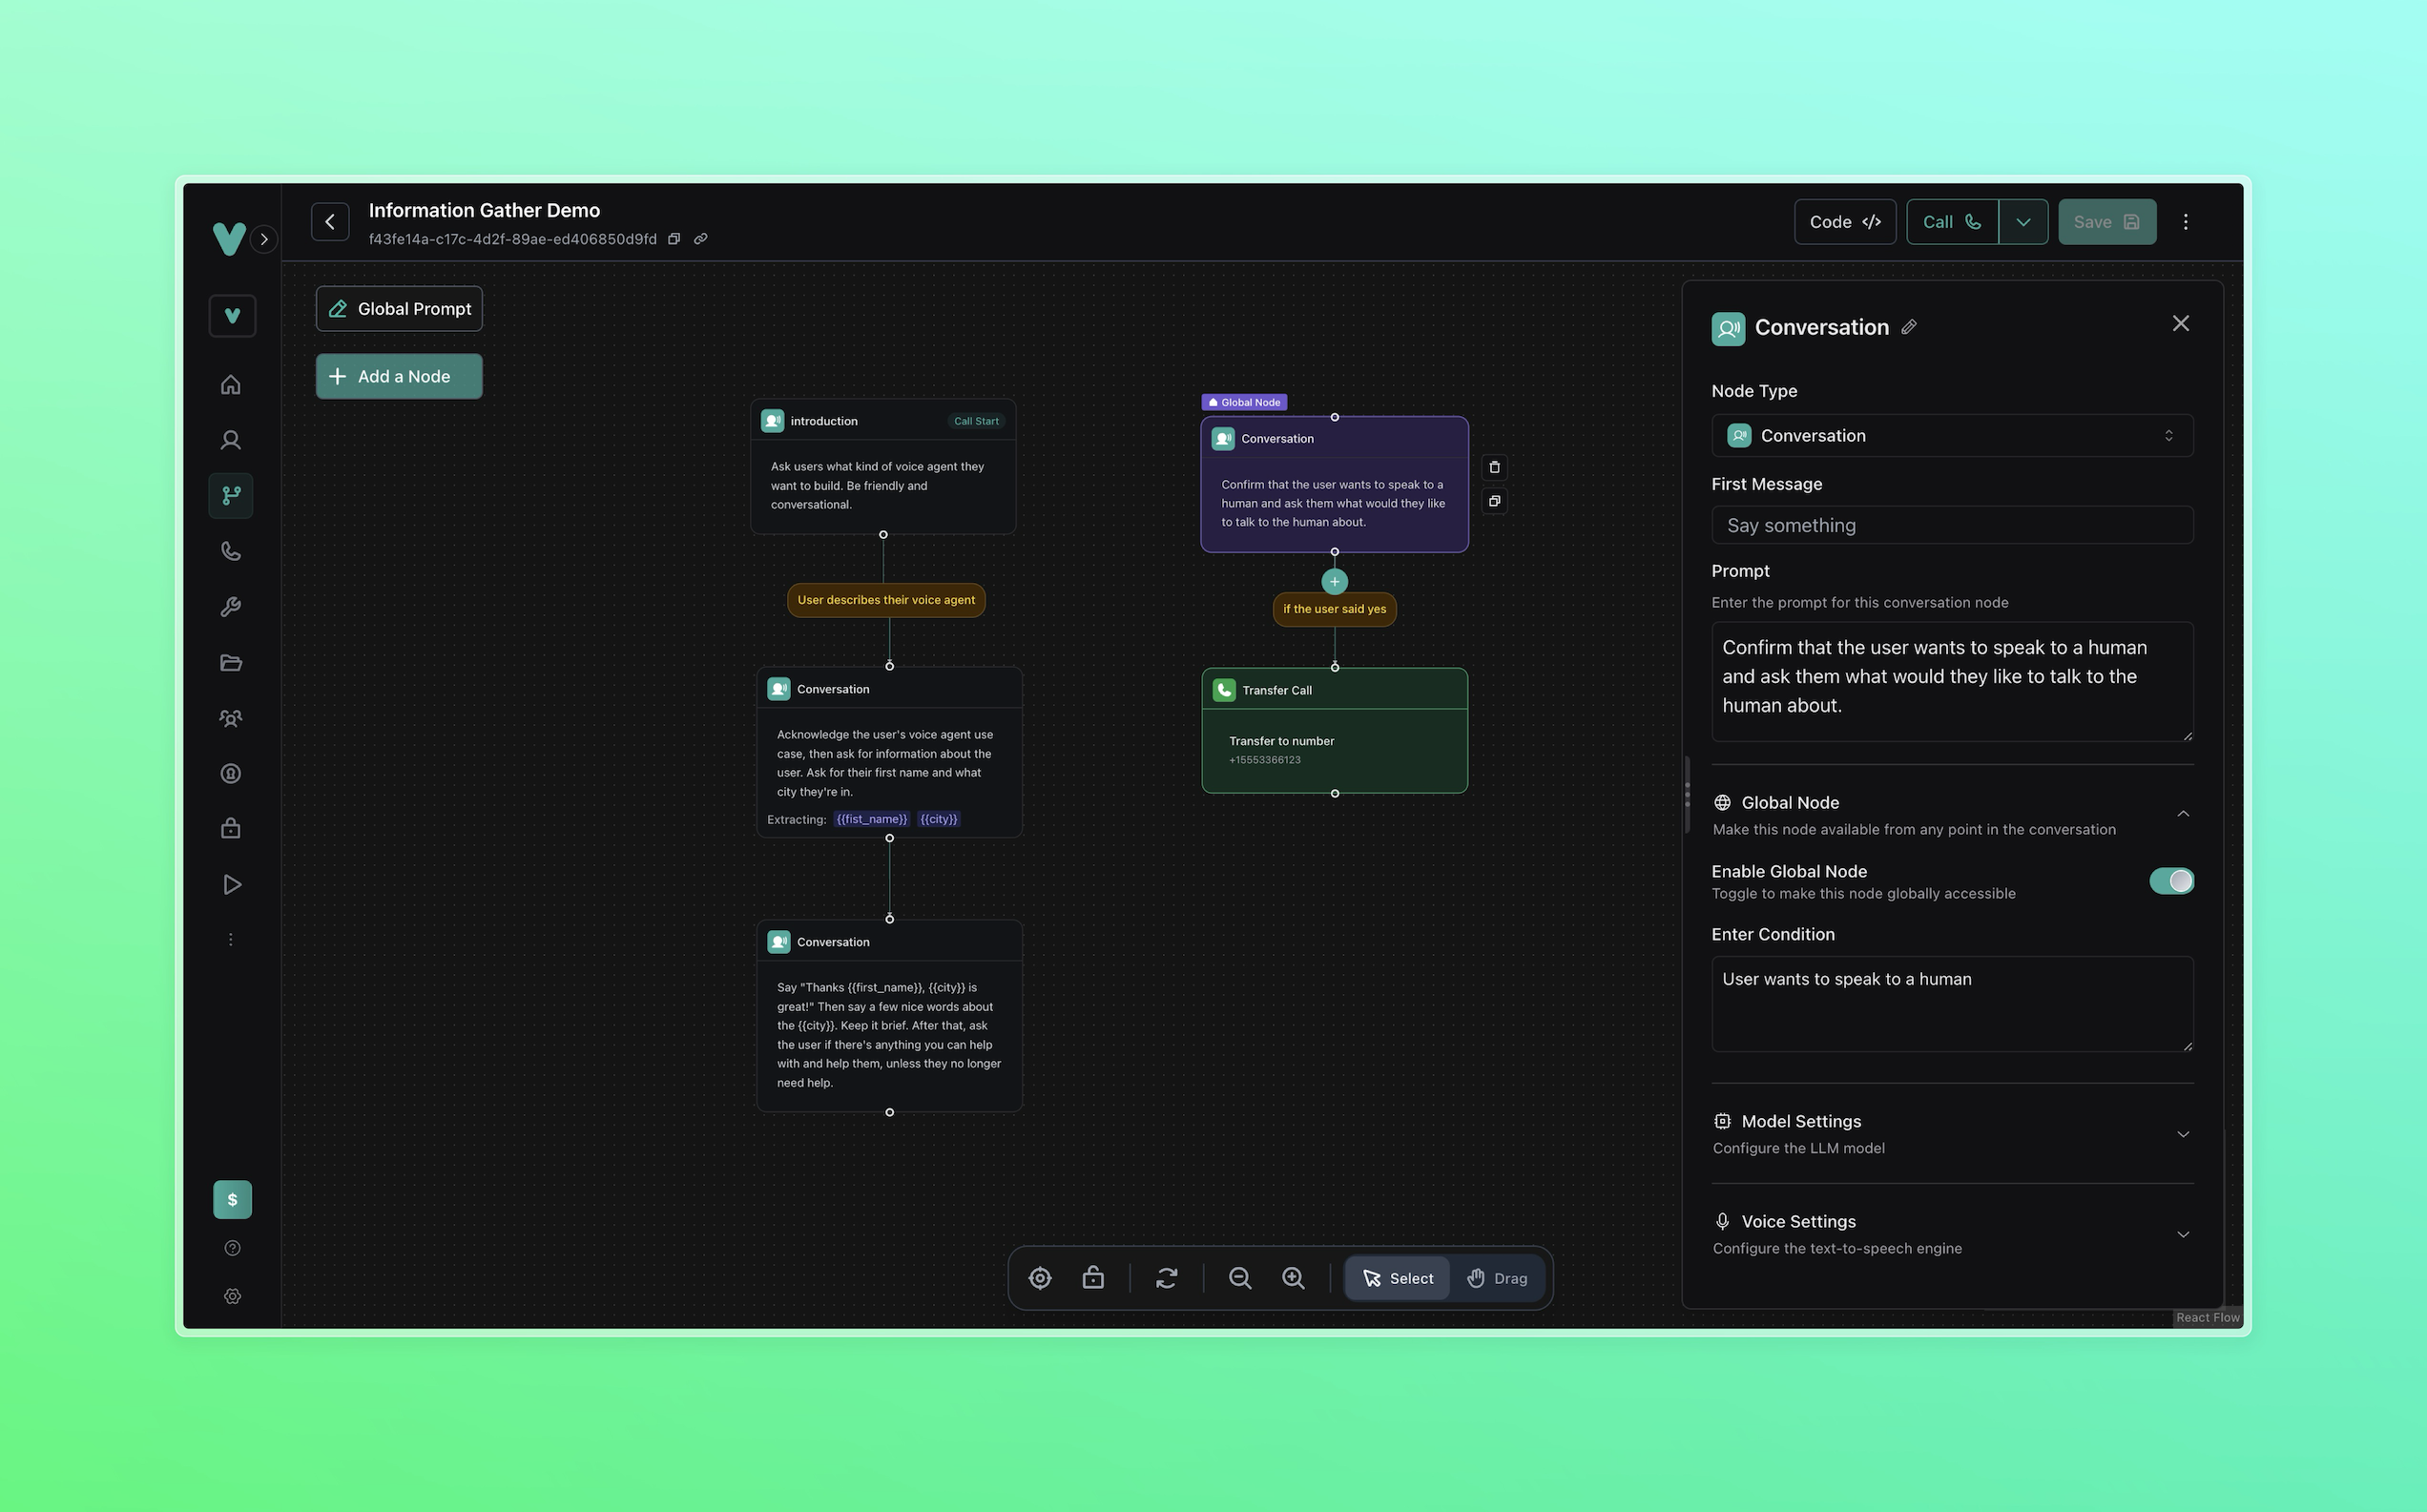
Build a simple voice agent using Vapi’s visual workflow builder that greets users, collects their information, and demonstrates core workflow concepts like variable extraction, conditional routing, and global nodes.
Agent Capabilities:
- Greet users and ask about their voice agent needs
- Extract and store user information (name and city)
- Use variables in dynamic responses
- Handle escalation to human agents at any point
What You’ll Build:
- Multi-node conversation flow with branching logic
- Variable extraction and liquid template usage
- Global escalation nodes for human transfer
- End-call automation with natural conversation termination
Prerequisites
- A Vapi account
- For SDK usage: API key from the Dashboard
Developing with the Vapi CLI? You can manage workflows and test webhook integrations from your terminal:
Scenario
We will create a simple information-gathering workflow that demonstrates the core features of Vapi’s workflow builder. This workflow will showcase conversation flow, variable extraction, and escalation patterns that form the foundation of more complex workflows.
Workflows vs Assistants: Workflows are visual conversation flows with branching logic and variable extraction. Assistants are single AI agents with tools and continuous conversation. This guide covers workflows specifically.
1. Create a Workflow
Dashboard
TypeScript (Server SDK)
Python (Server SDK)
cURL
2. Configure the Start Node
Dashboard
TypeScript (Server SDK)
Python (Server SDK)
cURL
You can change the node type by selecting a different type from the dropdown at the top of the node configuration panel. For example, you can change the start node type to API Request to trigger an HTTP request as soon as the call is connected.
3. Add Information Collection Flow
Dashboard
TypeScript (Server SDK)
Python (Server SDK)
cURL
Add a second conversation node
- Click the + button below the first node
- Select Conversation Node
- Configure the new node:
Prompt:
Extract Variables (expand this section):
- Variable 1:
- Name:
first_name - Type:
string - Description:
the user's first name
- Name:
- Variable 2:
- Name:
city - Type:
string - Description:
the user's city
- Name:
4. Add Dynamic Response Node
Dashboard
TypeScript (Server SDK)
Python (Server SDK)
cURL
5. Add Global Escalation Node
Dashboard
TypeScript (Server SDK)
Python (Server SDK)
cURL
Developers can specify a phone number destination and a transfer plan, which lets them specify a message or a summary of the call to the person or agent picking up in the destination number before actually connecting the call.
6. Add Call Termination
Dashboard
TypeScript (Server SDK)
Python (Server SDK)
cURL
7. Test Your Workflow
Dashboard
TypeScript (Server SDK)
Python (Server SDK)
cURL
Test the complete flow
Click Call in the top right to test your workflow:
- Verify the greeting works
- Test variable extraction by providing your name and city
- Confirm the dynamic response uses your information
- Test the global escalation by saying “I want to speak to a human”
Review your workflow structure
Your final workflow should have:
- Start Node: Greeting and use case inquiry
- Collection Node: Information gathering with variable extraction
- Response Node: Dynamic response using extracted variables
- Global Node: Human escalation available from anywhere
- Transfer Node: Routes to human agent when needed
- End Node: Natural conversation termination
Next Steps
- Workflows overview - Learn about all node types and advanced configuration options
- Workflow examples - Explore pre-built workflows for common business use cases
- Custom Tools - Integrate external APIs and services into your workflows
- Dynamic Variables - Advanced variable usage and personalization techniques