

Setting server URLs
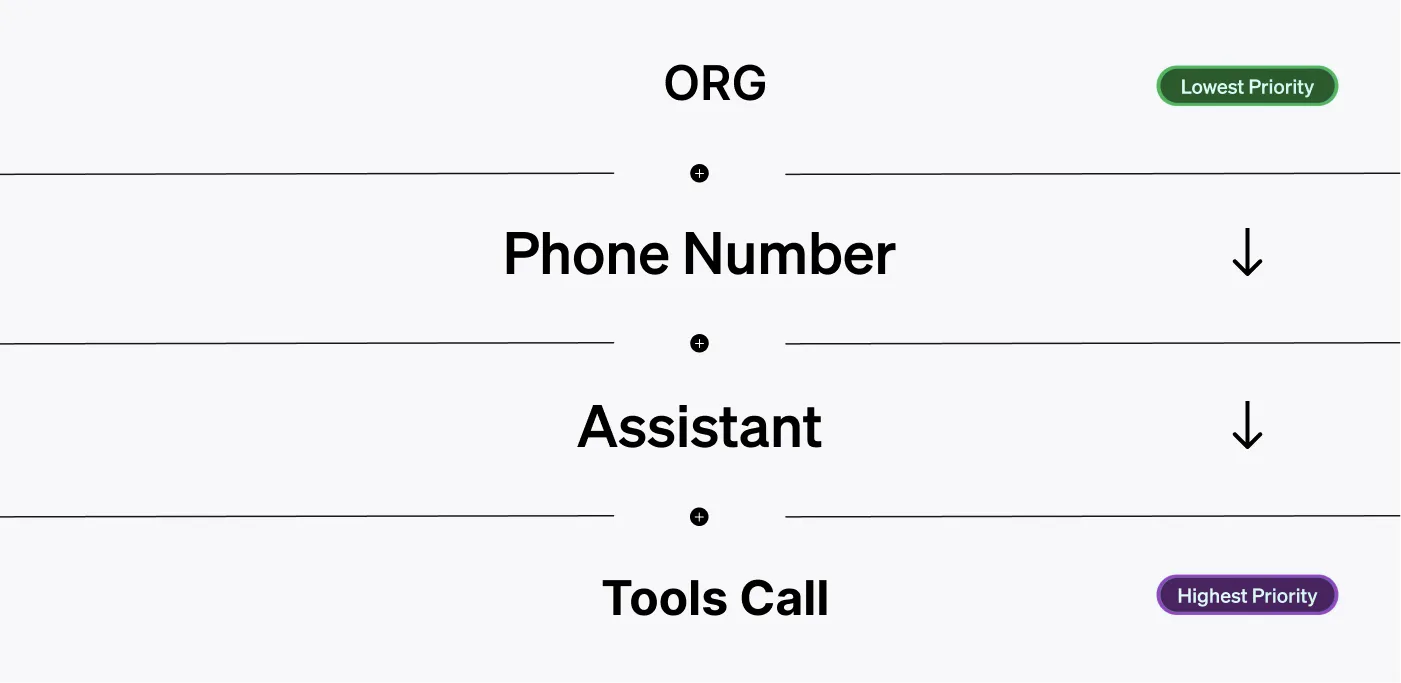
Server URLs can be set in multiple places in Vapi. Each level has a different priority.
The server URL with the highest priority for a relevant event will be the one that Vapi uses to send the event to.
Server URLs can be set at 4 levels in Vapi:
- Account-wide: you can set a server URL for your broader account
- Phone Number: server URLs can be attached to phone numbers themselves
- Assistant: assistants can be configured with a server URL
- Function tool: Function tools can have their own server URL
Setting Server URLs
Here’s a breakdown of where you can set server URLs in Vapi:
Organization
If your server requires authentication, create a custom credential before configuring the server URL.
Choose a credential
Expand Authorization, then choose the Credential you created. If your server does not require authentication, keep No authentication selected.
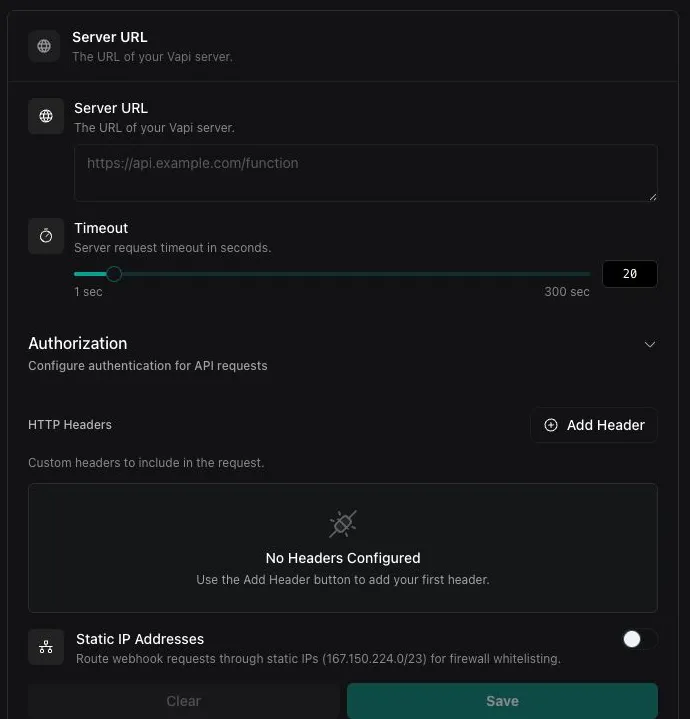
If no other server URL is set, Vapi will use this one.
Phone Number
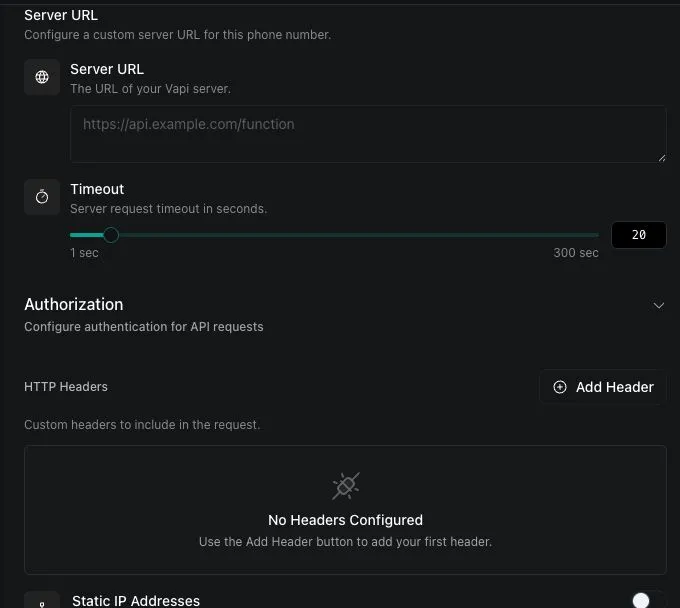
Phone numbers can have a server URL attached to them in the Dashboard or via the phone number API.
In the Dashboard
If your server requires authentication, create a custom credential before configuring the server URL.
Select a phone number
Open the Dashboard. Select Phone Numbers, then select the phone number you want to configure.
Choose a credential
Expand Authorization, then choose the Credential you created. If your server does not require authentication, keep No authentication selected.
Via the API
The server URL for phone numbers can be set 3 ways:
- At Time of Creation: when you create a free number through Vapi
- At Import: when you import from Twilio or create a Vonage phone number
- Via Update: you can update a number already in your account
The phone number’s server configuration includes both the URL and optional authentication:
phoneNumber.server.url: The webhook endpoint URLphoneNumber.server.credentialId: Authentication credential ID (optional)
For secured webhooks, create Custom Credentials and reference them using credentialId.
Assistant
Assistants themselves can have a server URL attached to them.
There are 2 ways this can be done:
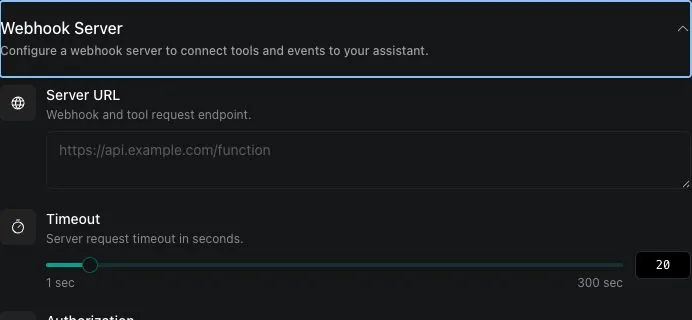
In the Dashboard
If your server requires authentication, create a custom credential before configuring the server URL.
Select an assistant
Open the Dashboard. Select Assistants, then select the assistant you want to configure.
Choose a credential
Under Authorization, choose the Credential you created. If your server does not require authentication, keep No authentication selected.
Via the API
At assistant creation (or via an update) you can set the assistant’s server configuration.
The assistant’s server configuration includes:
assistant.server.url: The webhook endpoint URLassistant.server.credentialId: Authentication credential ID (optional)
For secured webhooks, use Custom Credentials with credentialId instead of inline authentication.
Function tool
The most granular server URL can be set on a Function tool. This can be done either in the Dashboard or via code.
In the Dashboard
If your server requires authentication, create a custom credential before configuring the server URL.
Create a Function tool
Open the Dashboard. Select Tools, select Create Tool, then select Function tool.
Configure the server URL
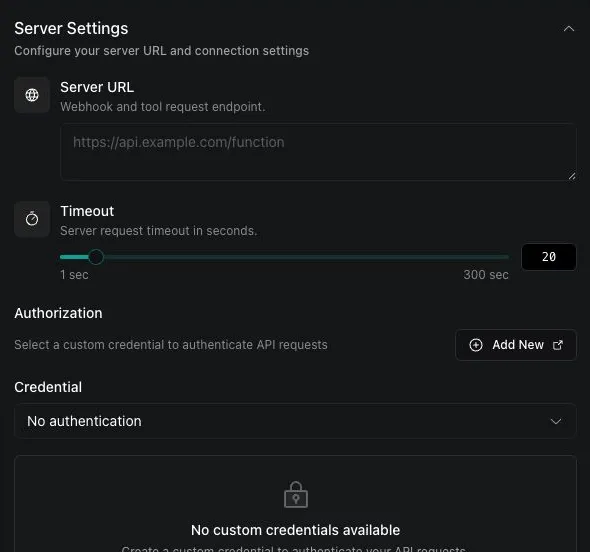
Under Server Settings, enter your endpoint in Server URL, then set the request Timeout.
Choose a credential
Under Authorization, choose the Credential you created. If your server does not require authentication, keep No authentication selected.
Via the API
Function tools can be configured with server endpoints via the tools API or within assistant configurations.
The server configuration for Function tools includes:
tool.server.url: The function endpoint URLtool.server.credentialId: Authentication credential ID (optional)
You can configure server settings for Function tools during tool creation, assistant creation, or updates.
Use Custom Credentials to secure your function endpoints with credentialId.
URL Priority
Events are only sent/assigned to 1 server URL in the priority stack. Here’s the order of priority:
- Function tool: if a Function tool has a server URL, the tool request will be sent to that URL
- Assistant: assistant server URLs are the next highest priority
- Phone Number: if a phone number has a server URL, it will be used over the account-wide URL
- Account-wide: Default / “lowest” importance. It will be used if no other server URL is set.
You will most commonly set a server URL on your account, and/or on specific assistants.