Twilio SIP Integration
This guide walks you through setting up both outbound and inbound SIP trunking between Twilio and Vapi. The steps are quite similar for other telephony providers.
Outbound Calls (Twilio to Vapi)
Twilio Configuration
-
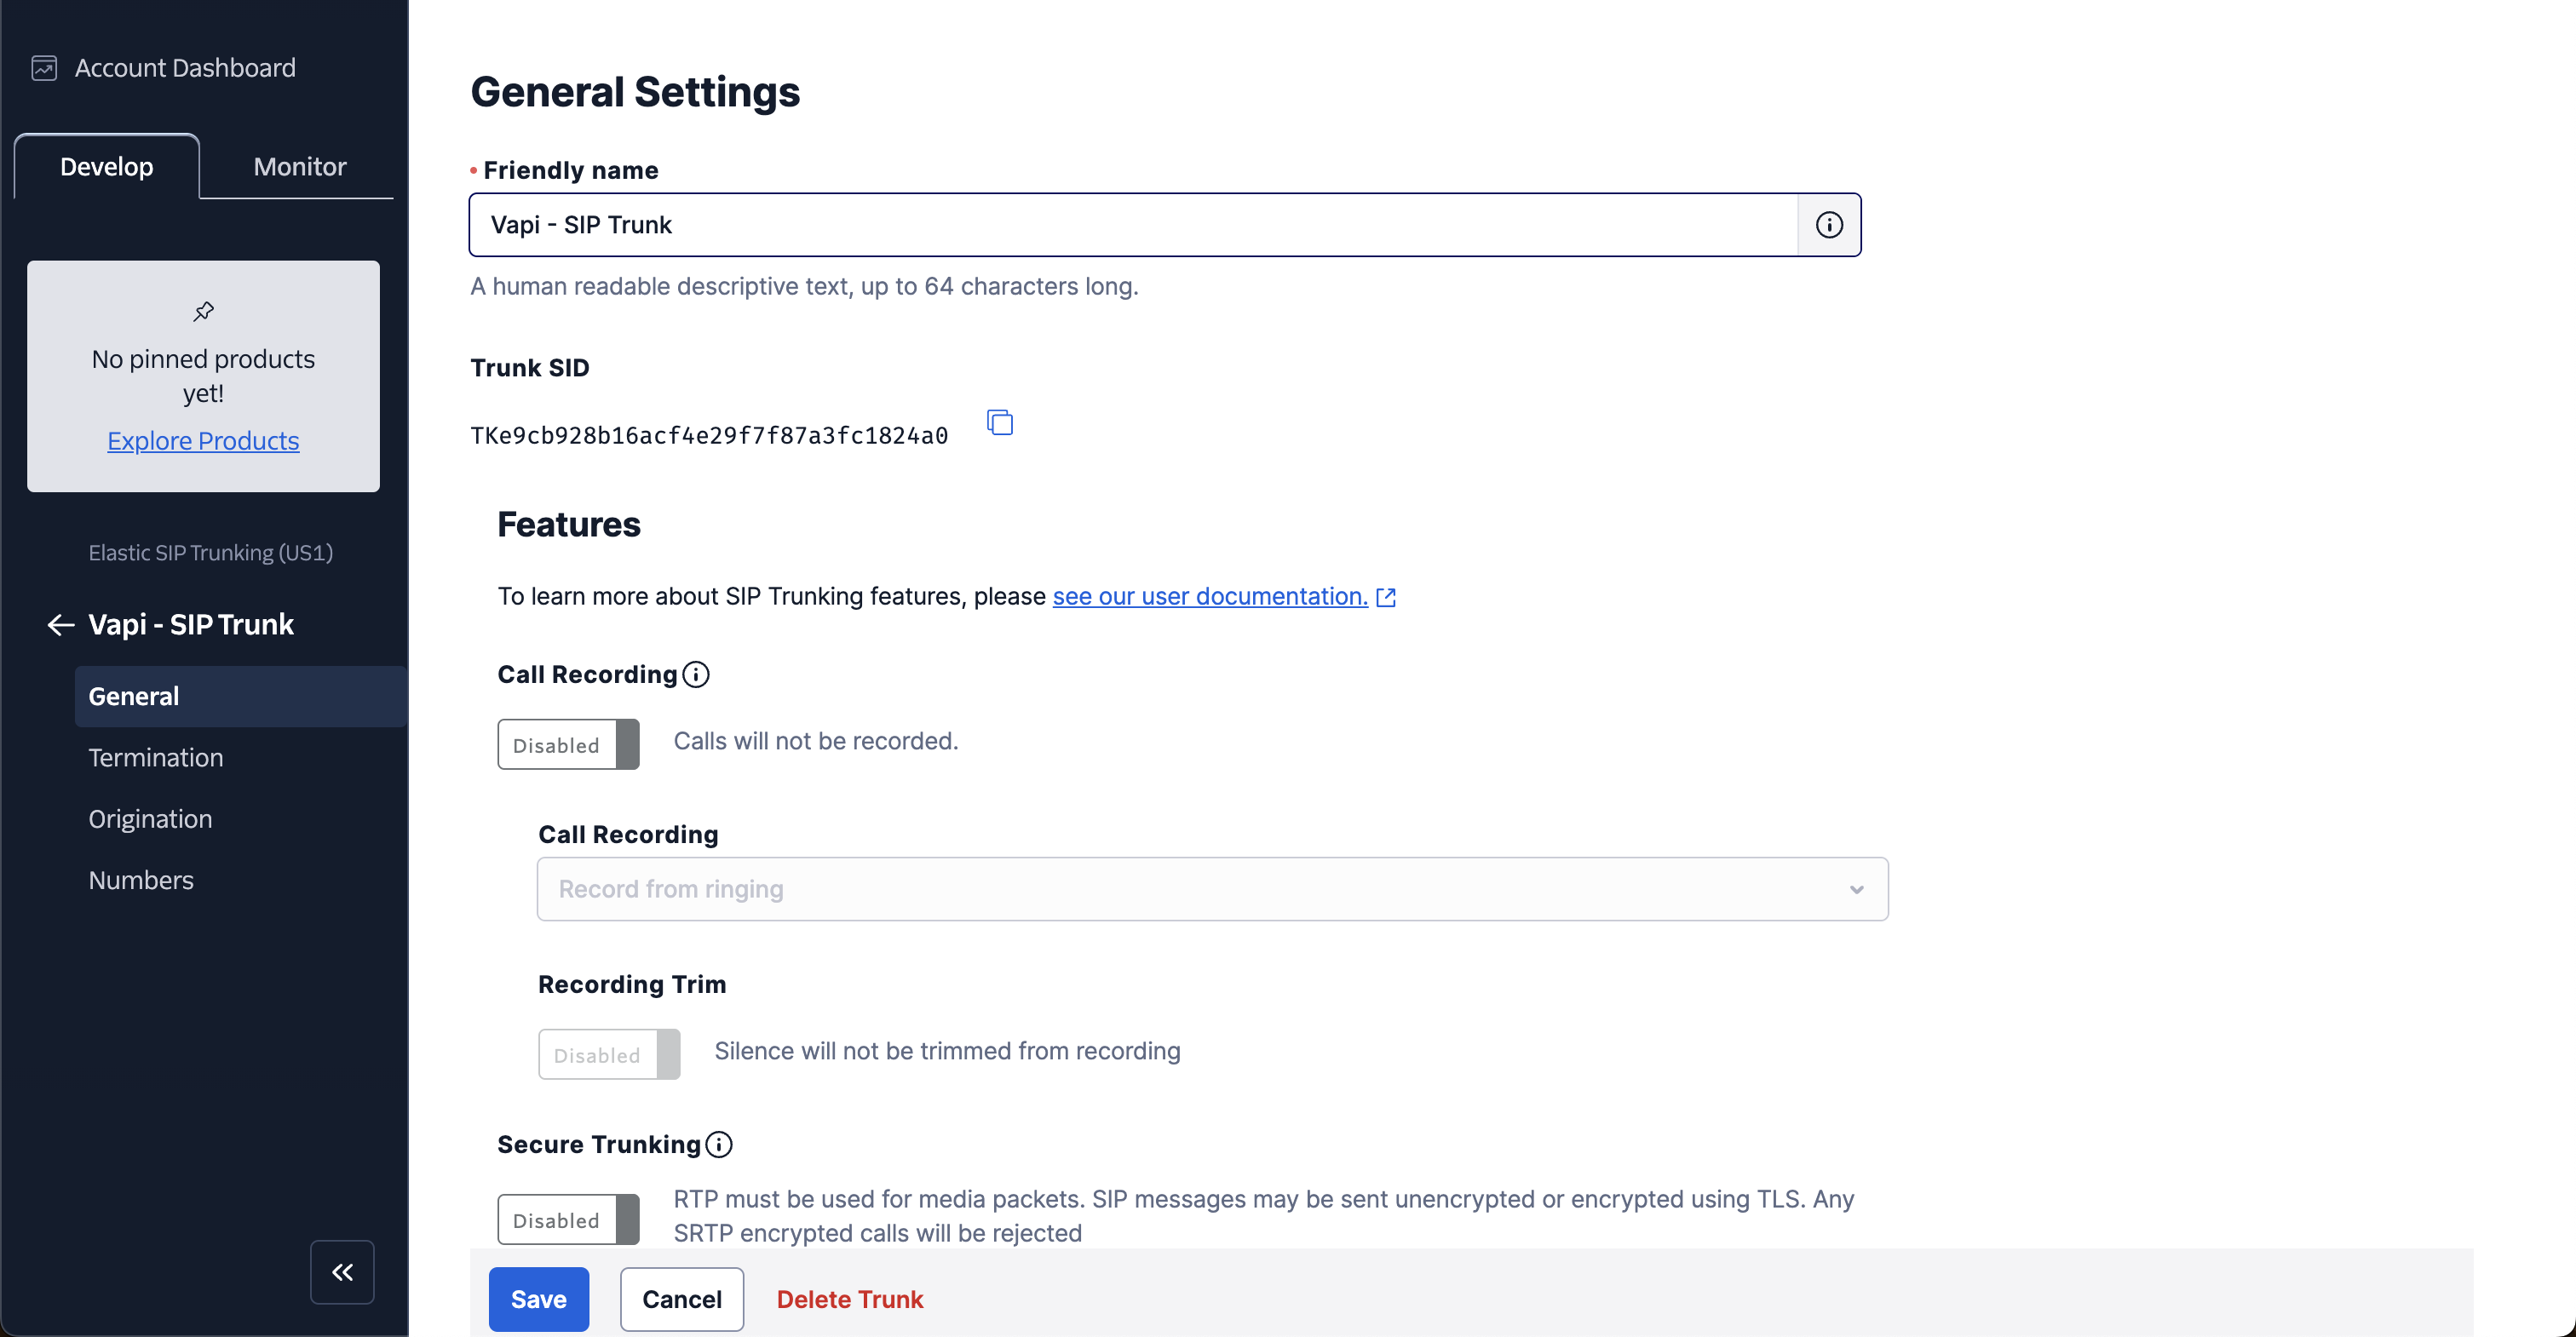
Create Elastic SIP Trunk
Log in to your Twilio account and create a new trunk, assigning it a name, and adjusting the general settings as needed.
-
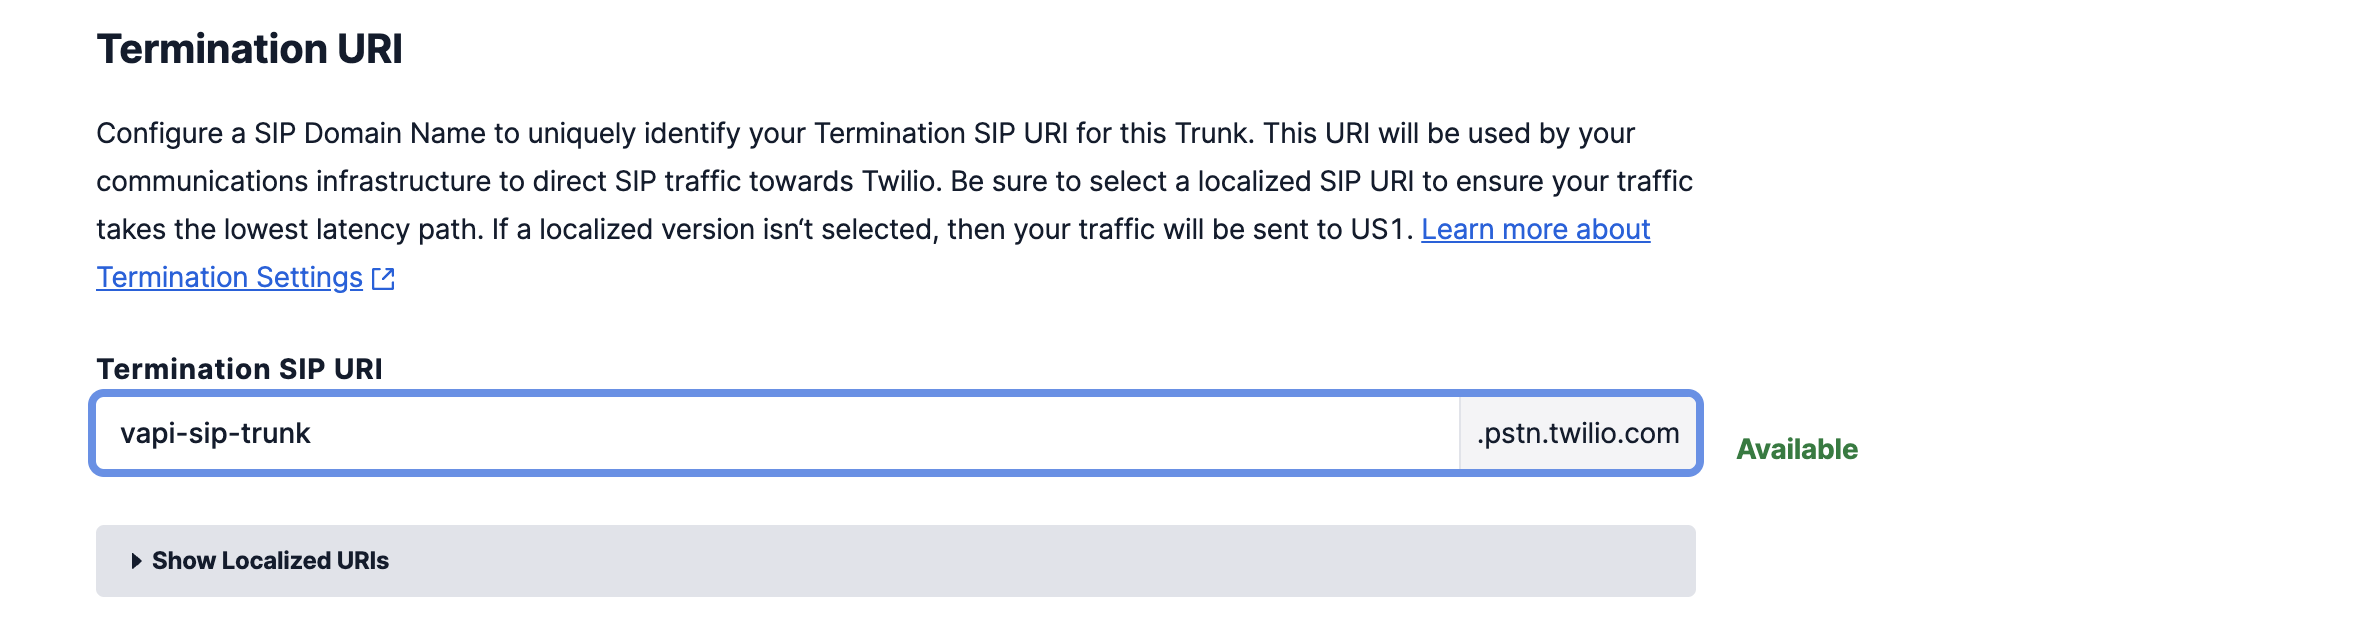
Set Up Termination (Outbound Calls)
Configure the termination settings. The termination SIP URI is crucial as it will be used in later steps.
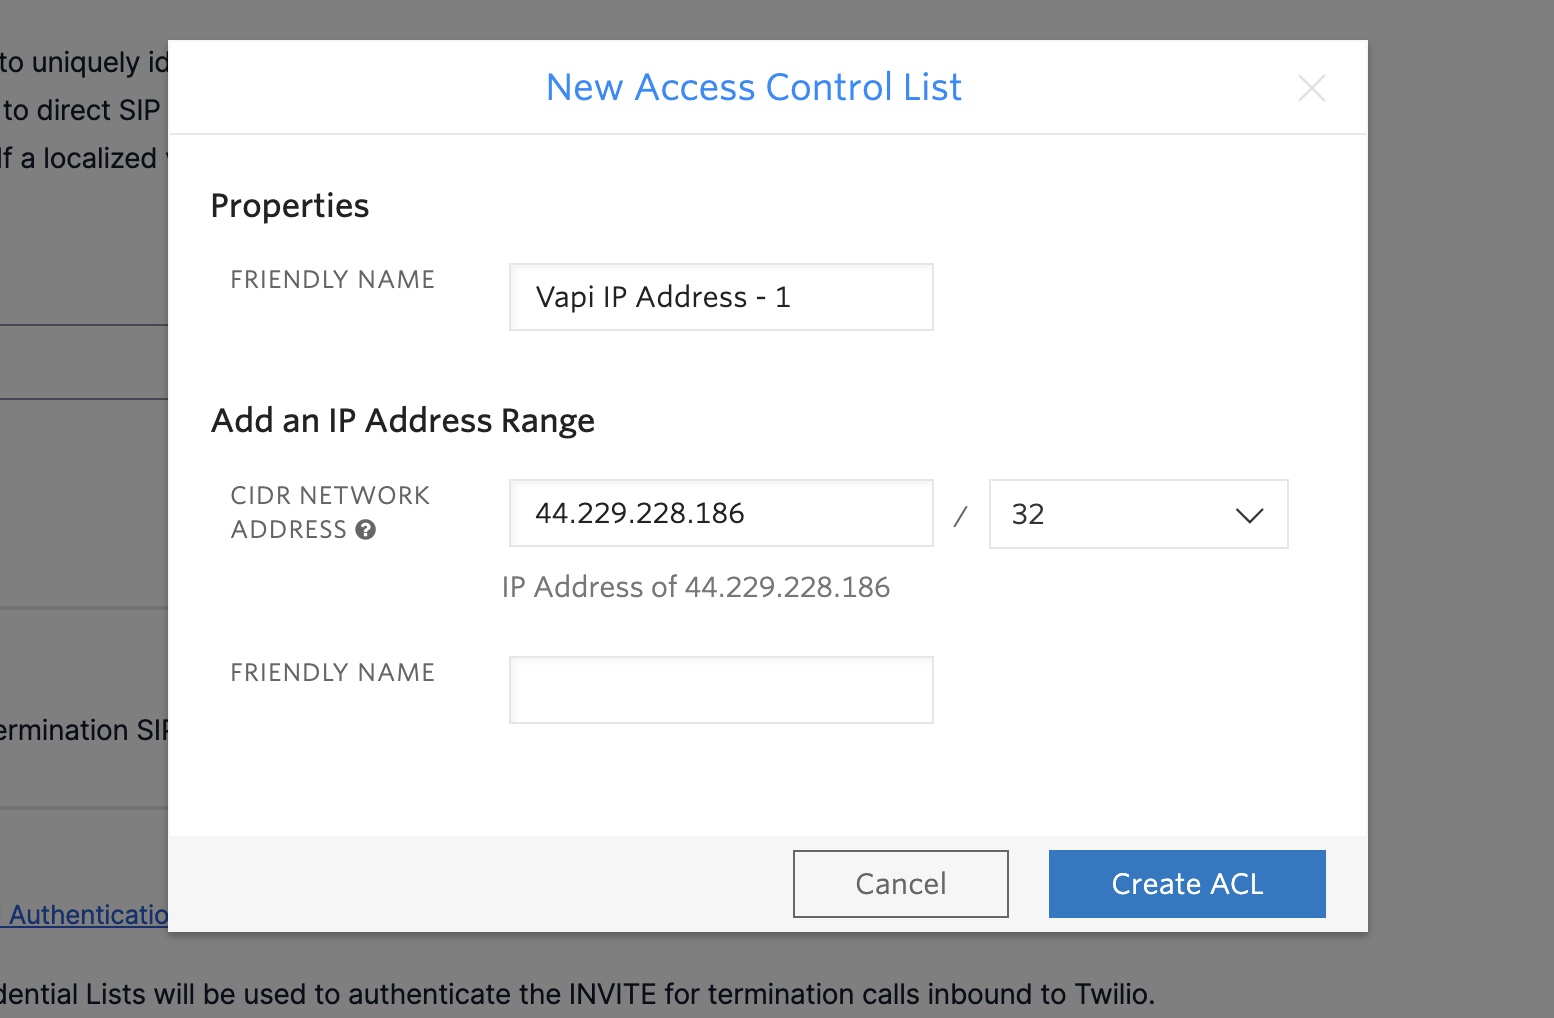
To allow your Elastic SIP Trunk to accept outbound requests, you need to whitelist IP addresses:
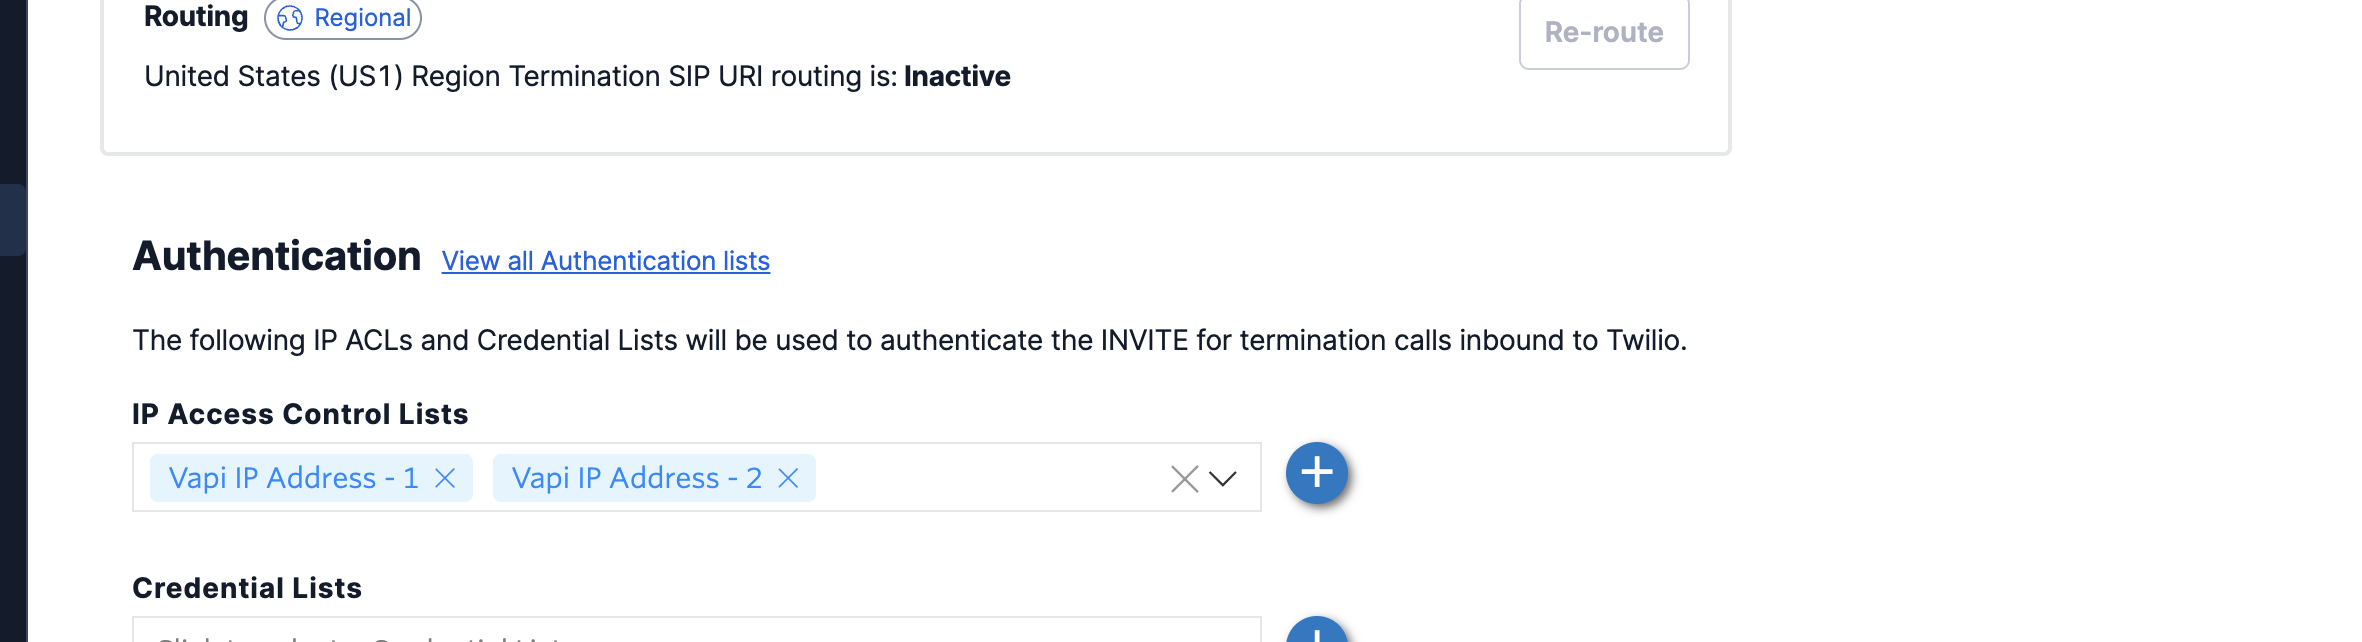
Whitelist Vapi’s SIP server static IPs for the Vapi region where your organization is hosted:
Ensure you whitelist the entire IP range as shown below:

-
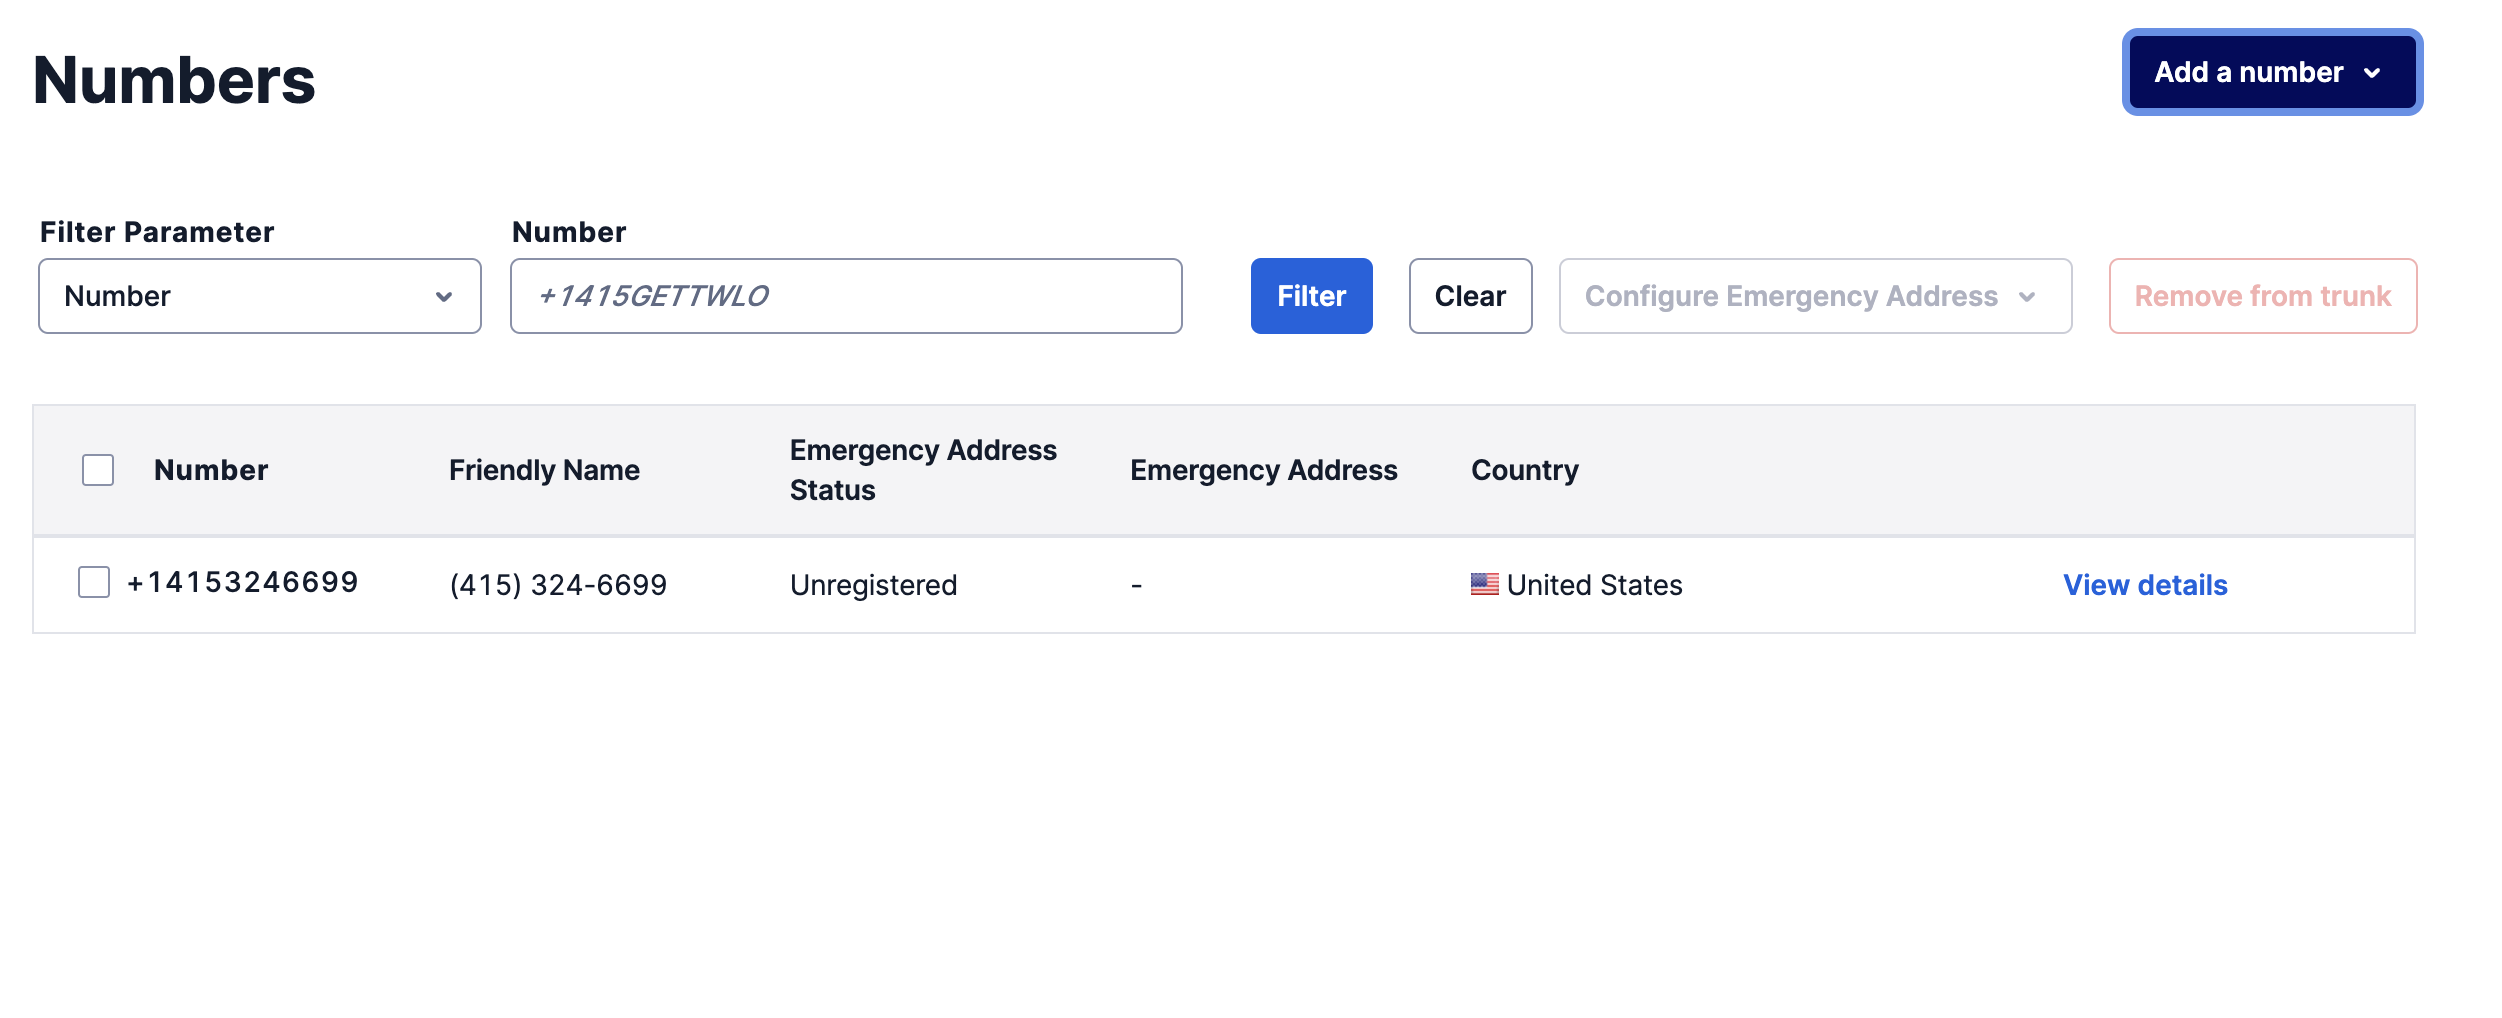
Purchase or Move Numbers to Elastic SIP Trunk
After creating the Elastic SIP trunk, purchase new numbers or move existing numbers to this trunk.
Vapi Configuration
-
Retrieve Your Vapi API Key
Log in to your Vapi.ai account and retrieve your API key from the Organization Settings.
-
Create a SIP Trunk Credential
Use the following API call to create a SIP trunk credential. Configure the Twilio termination hostname as an outbound-only gateway. Configure Twilio’s published signaling networks as separate inbound-only gateways.
The example below uses a Dublin termination hostname with Twilio’s Ireland and Frankfurt signaling networks:
Replace the example hostname and networks with the values for your Twilio trunk’s selected edges. Add every primary and failover signaling network that can originate calls. Use Twilio’s current Elastic SIP Trunking IP address list as the source of truth.
A termination hostname can be used for outbound routing because Vapi resolves it when placing a call. It cannot identify inbound traffic: Vapi must match the source of an incoming SIP request against a numeric IPv4 network. The
netmaskvalue represents the CIDR prefix, so a/30network is configured as"netmask": 30.If you are adding inbound gateways to an existing credential, send a
PATCH /credential/YOUR_CREDENTIAL_IDrequest with the completegatewaysarray, including the existing outbound gateway and the new inbound networks.Note the
id(credentialId) from the response for the next step. -
Register Your Phone Number
Associate your Twilio number with the SIP trunk:
Note the phone number ID from the response for making calls.
-
Make Outbound Calls
You can make outbound calls in two ways:
Using the Vapi Dashboard:
The phone number will appear in your dashboard. Select your assistant and enter the destination number you want to call.
Using the API:
Inbound Calls (Vapi to Twilio)
Twilio Configuration
-
Set Up Origination (Inbound Calls)
Navigate to the Origination section in your Twilio SIP Trunk settings.
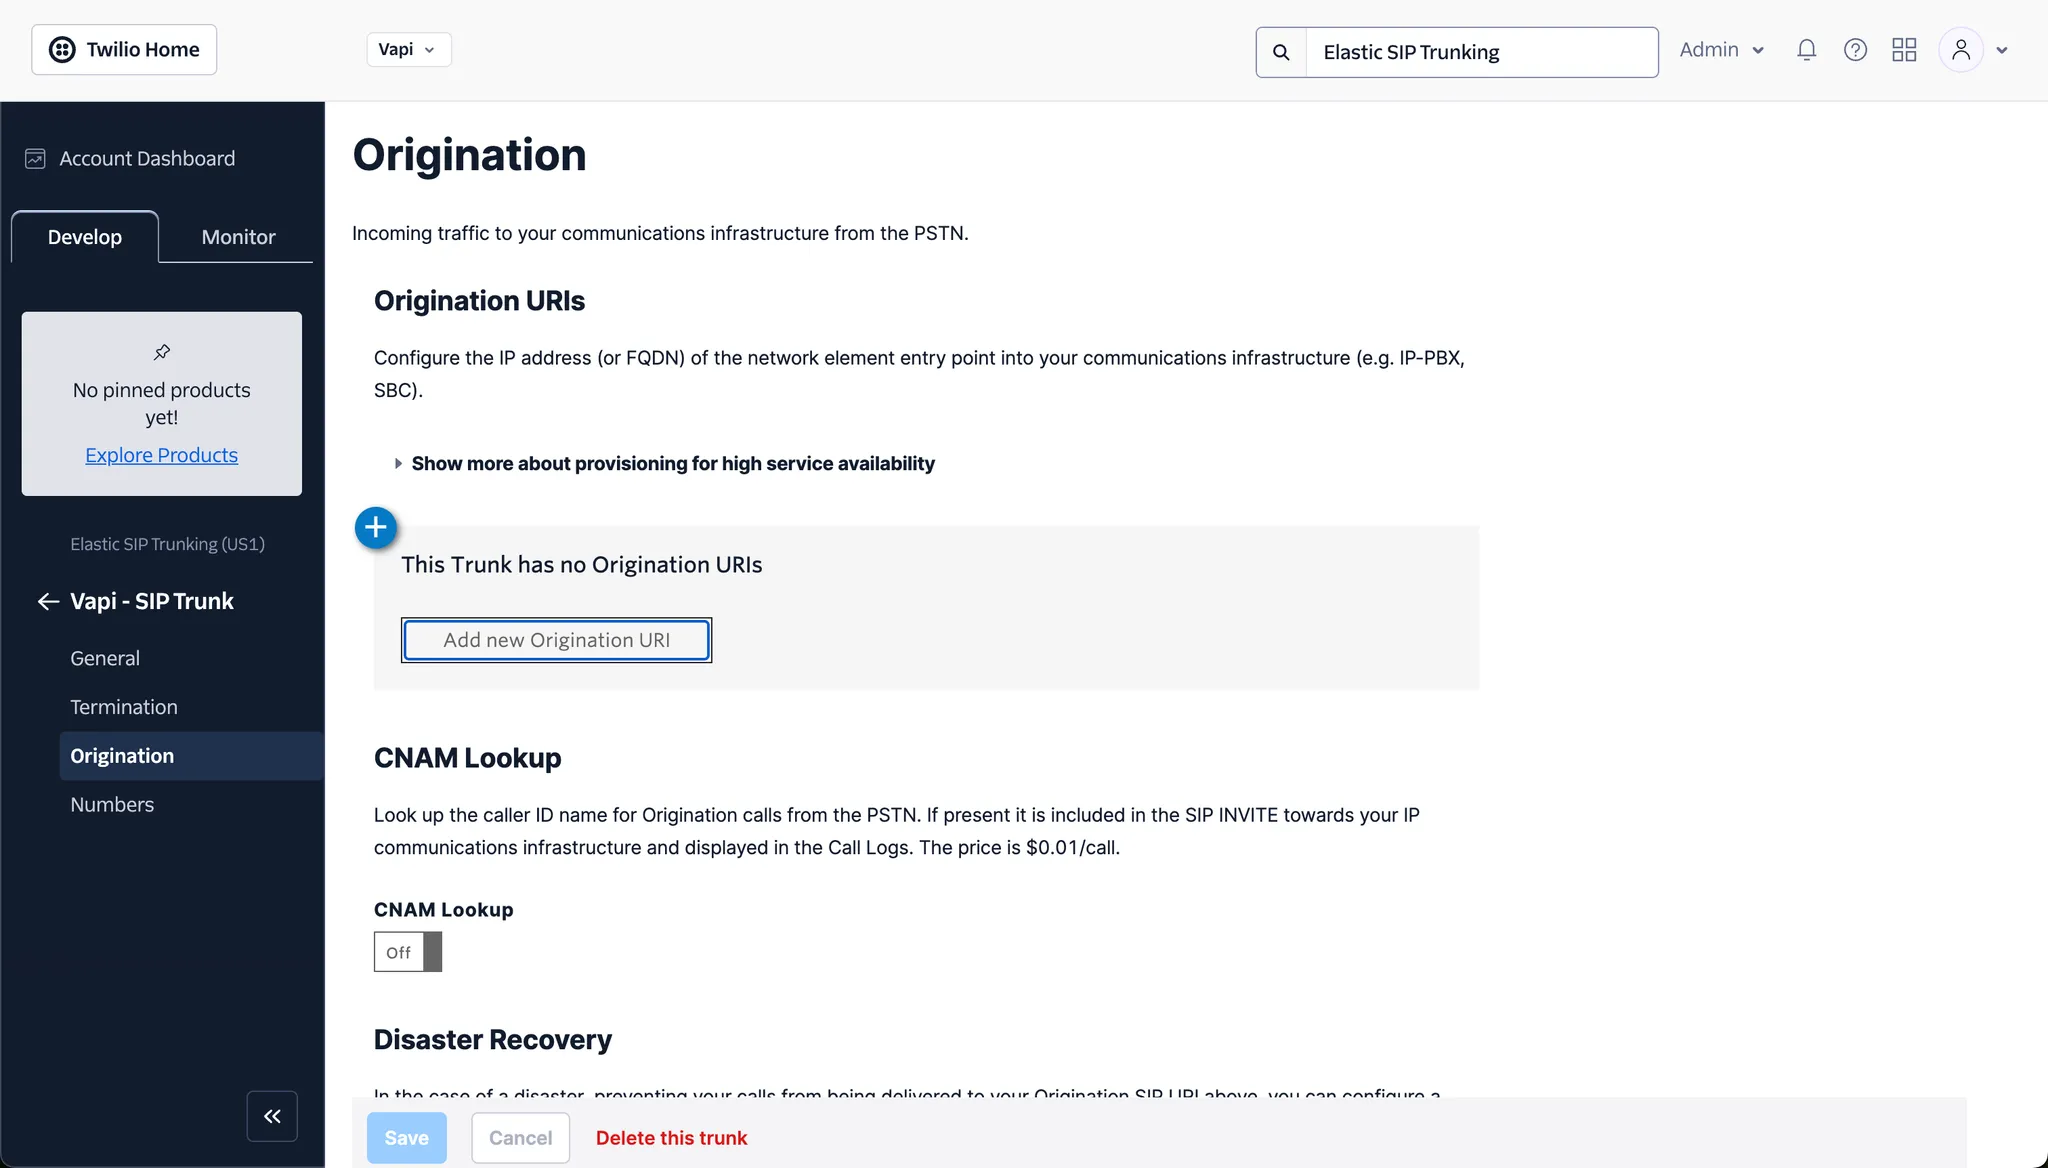
Add your Vapi SIP URI using the SIP host for your Vapi region:
- US:
sip:YOUR_PHONE_NUMBER@<credential_id>.sip.vapi.ai - EU:
sip:YOUR_PHONE_NUMBER@<credential_id>.sip.eu.vapi.ai - TLS/SIPS: add port
5061and;transport=tls, for examplesip:YOUR_PHONE_NUMBER@<credential_id>.sip.eu.vapi.ai:5061;transport=tls
YOUR_PHONE_NUMBERis your chosen SIP number that you will attach to this trunk.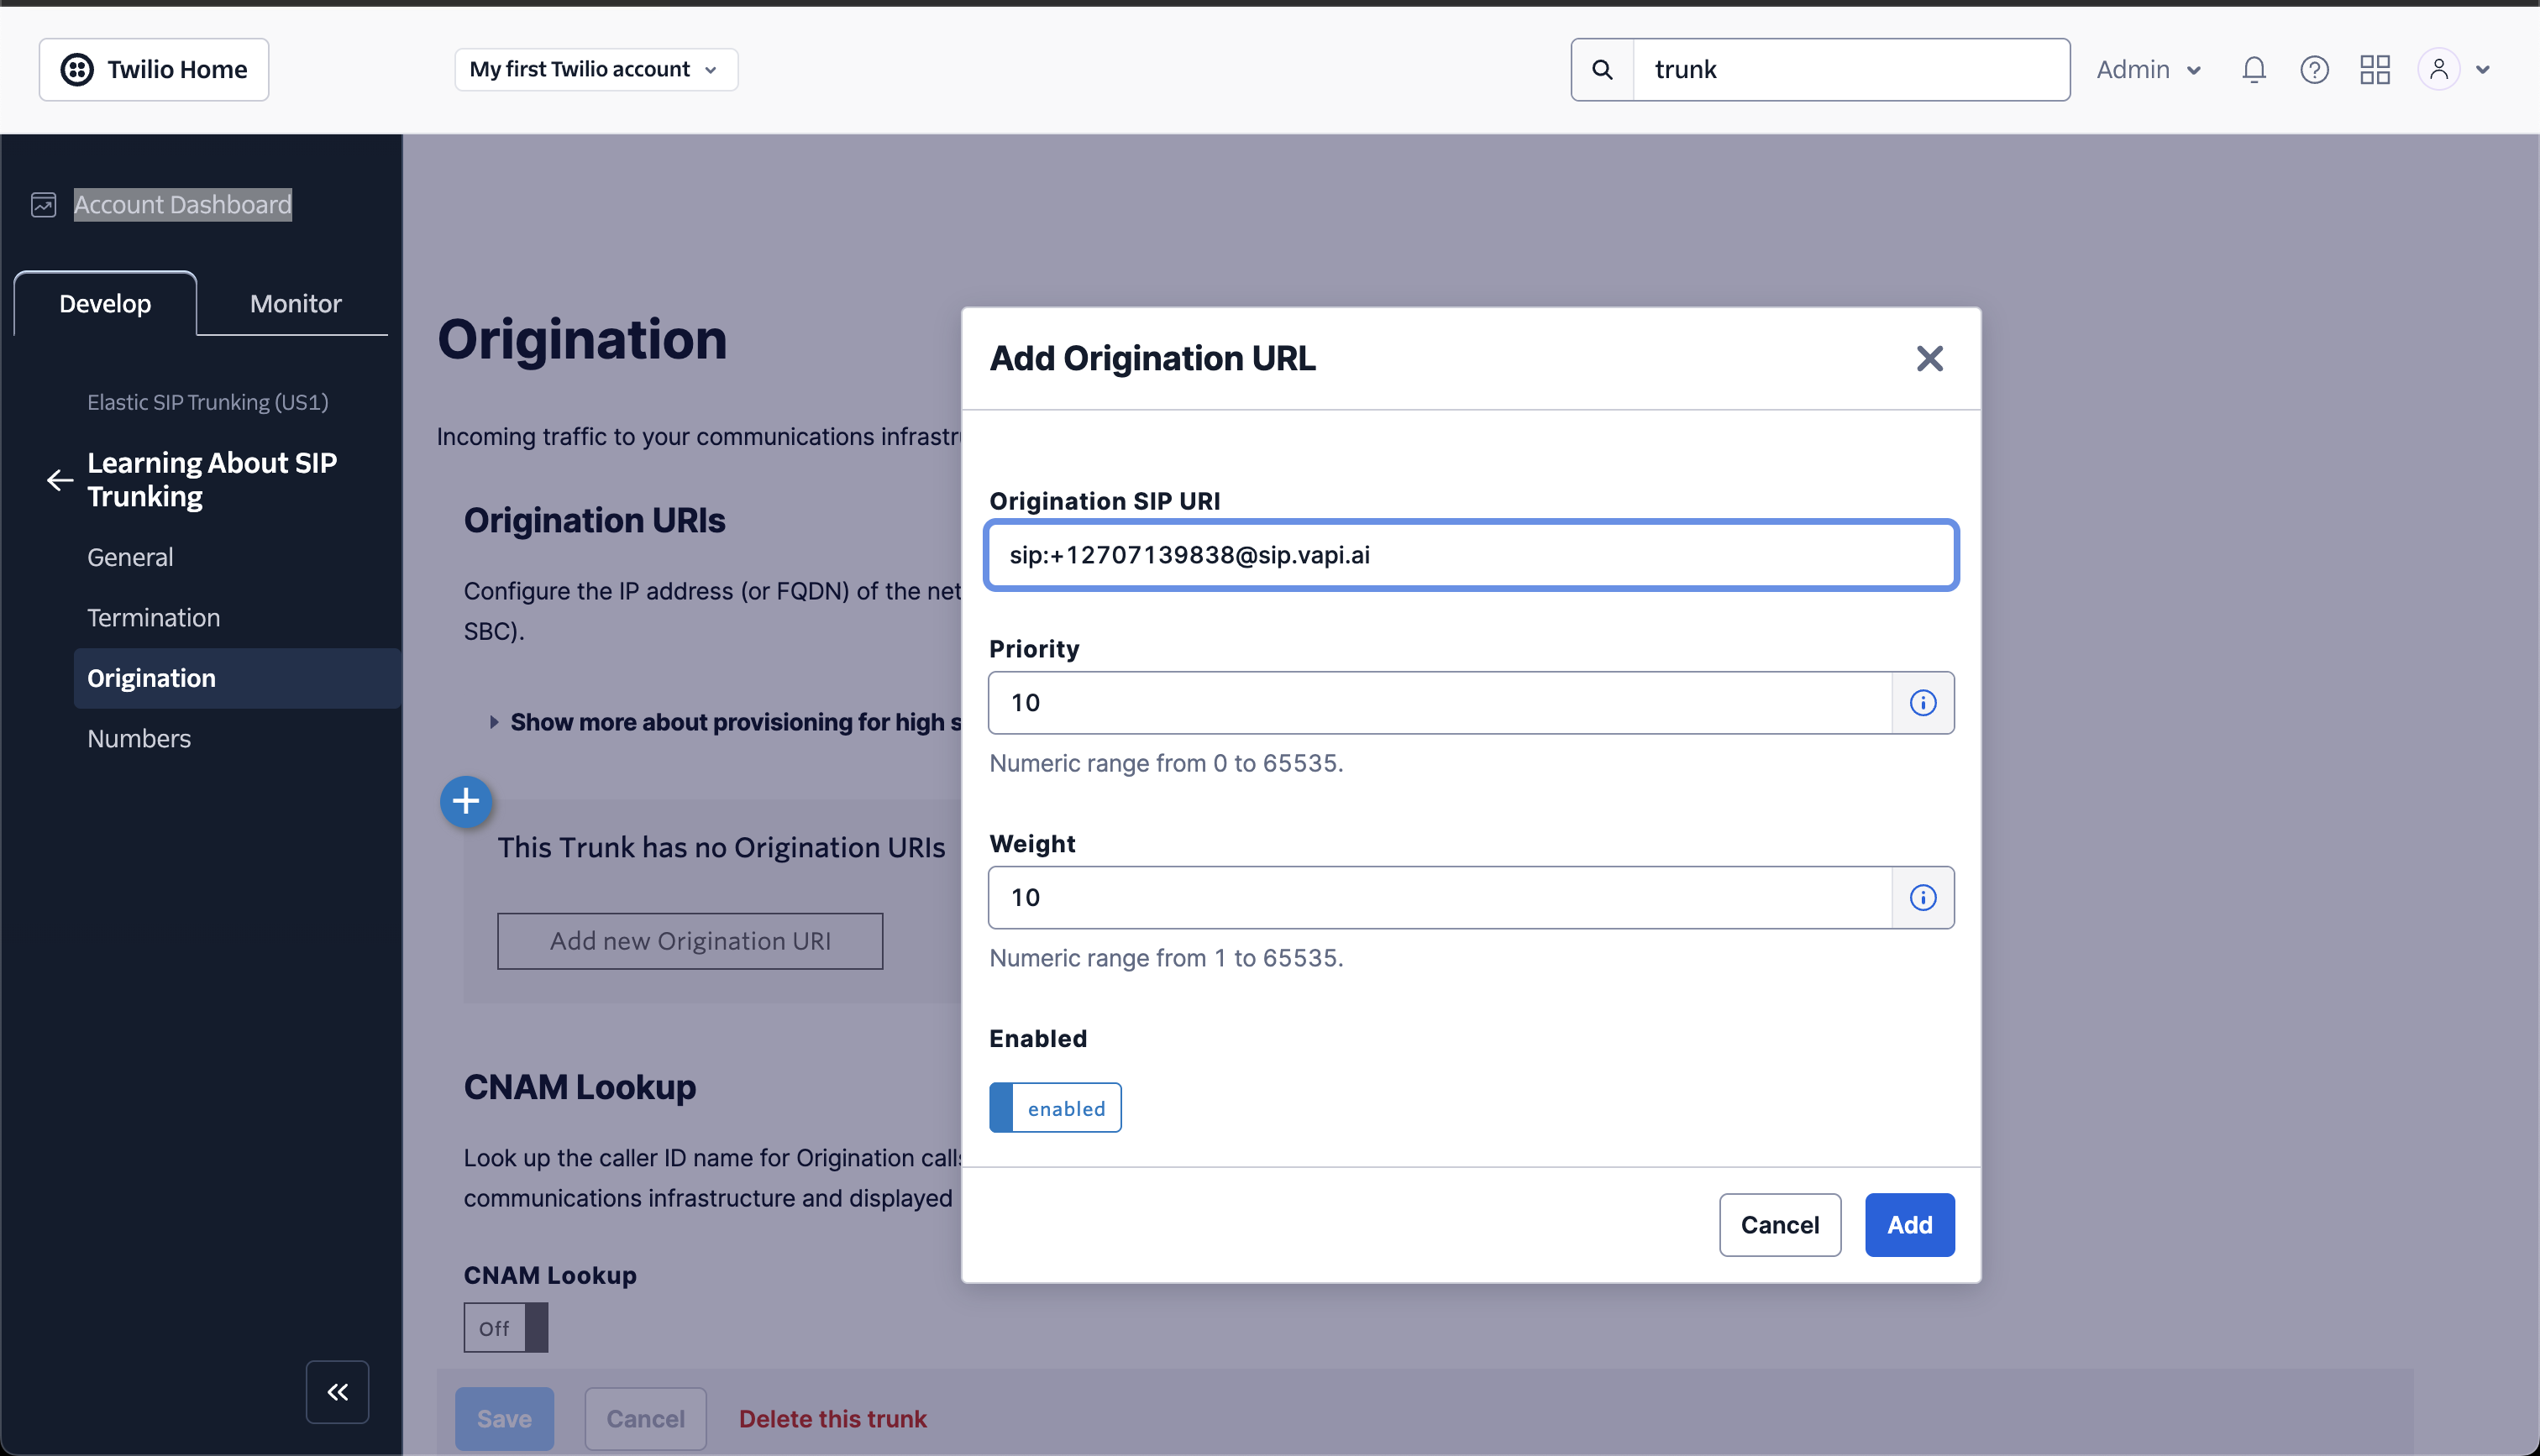
- US:
Vapi Configuration
-
Create and Configure a Vapi Assistant
- Create an assistant following the steps in our Phone Quickstart
- In the assistant settings, link it to the phone number you created
Now when someone calls your Twilio number, the call will be routed to your Vapi assistant.
If inbound calls do not reach Vapi, verify that the credential includes the numeric Twilio signaling networks for every origination edge you configured. Adding only the Twilio termination hostname enables outbound routing but does not allowlist inbound SIP traffic.