Telnyx SIP integration
Integrate your Telnyx SIP trunk with Vapi to enable your AI voice assistants to handle calls efficiently. This guide walks you through the complete setup process for both inbound and outbound calls.
Configure Telnyx for inbound calls
Create a SIP trunk
- Go to Voice / SIP Trunking / Create
- Select FQDN
- Click “Add FQDN”
- Select A record type
- Set FQDN to the SIP host for your Vapi region:
sip.vapi.aifor US orsip.eu.vapi.aifor EU - Port should be 5060 by default
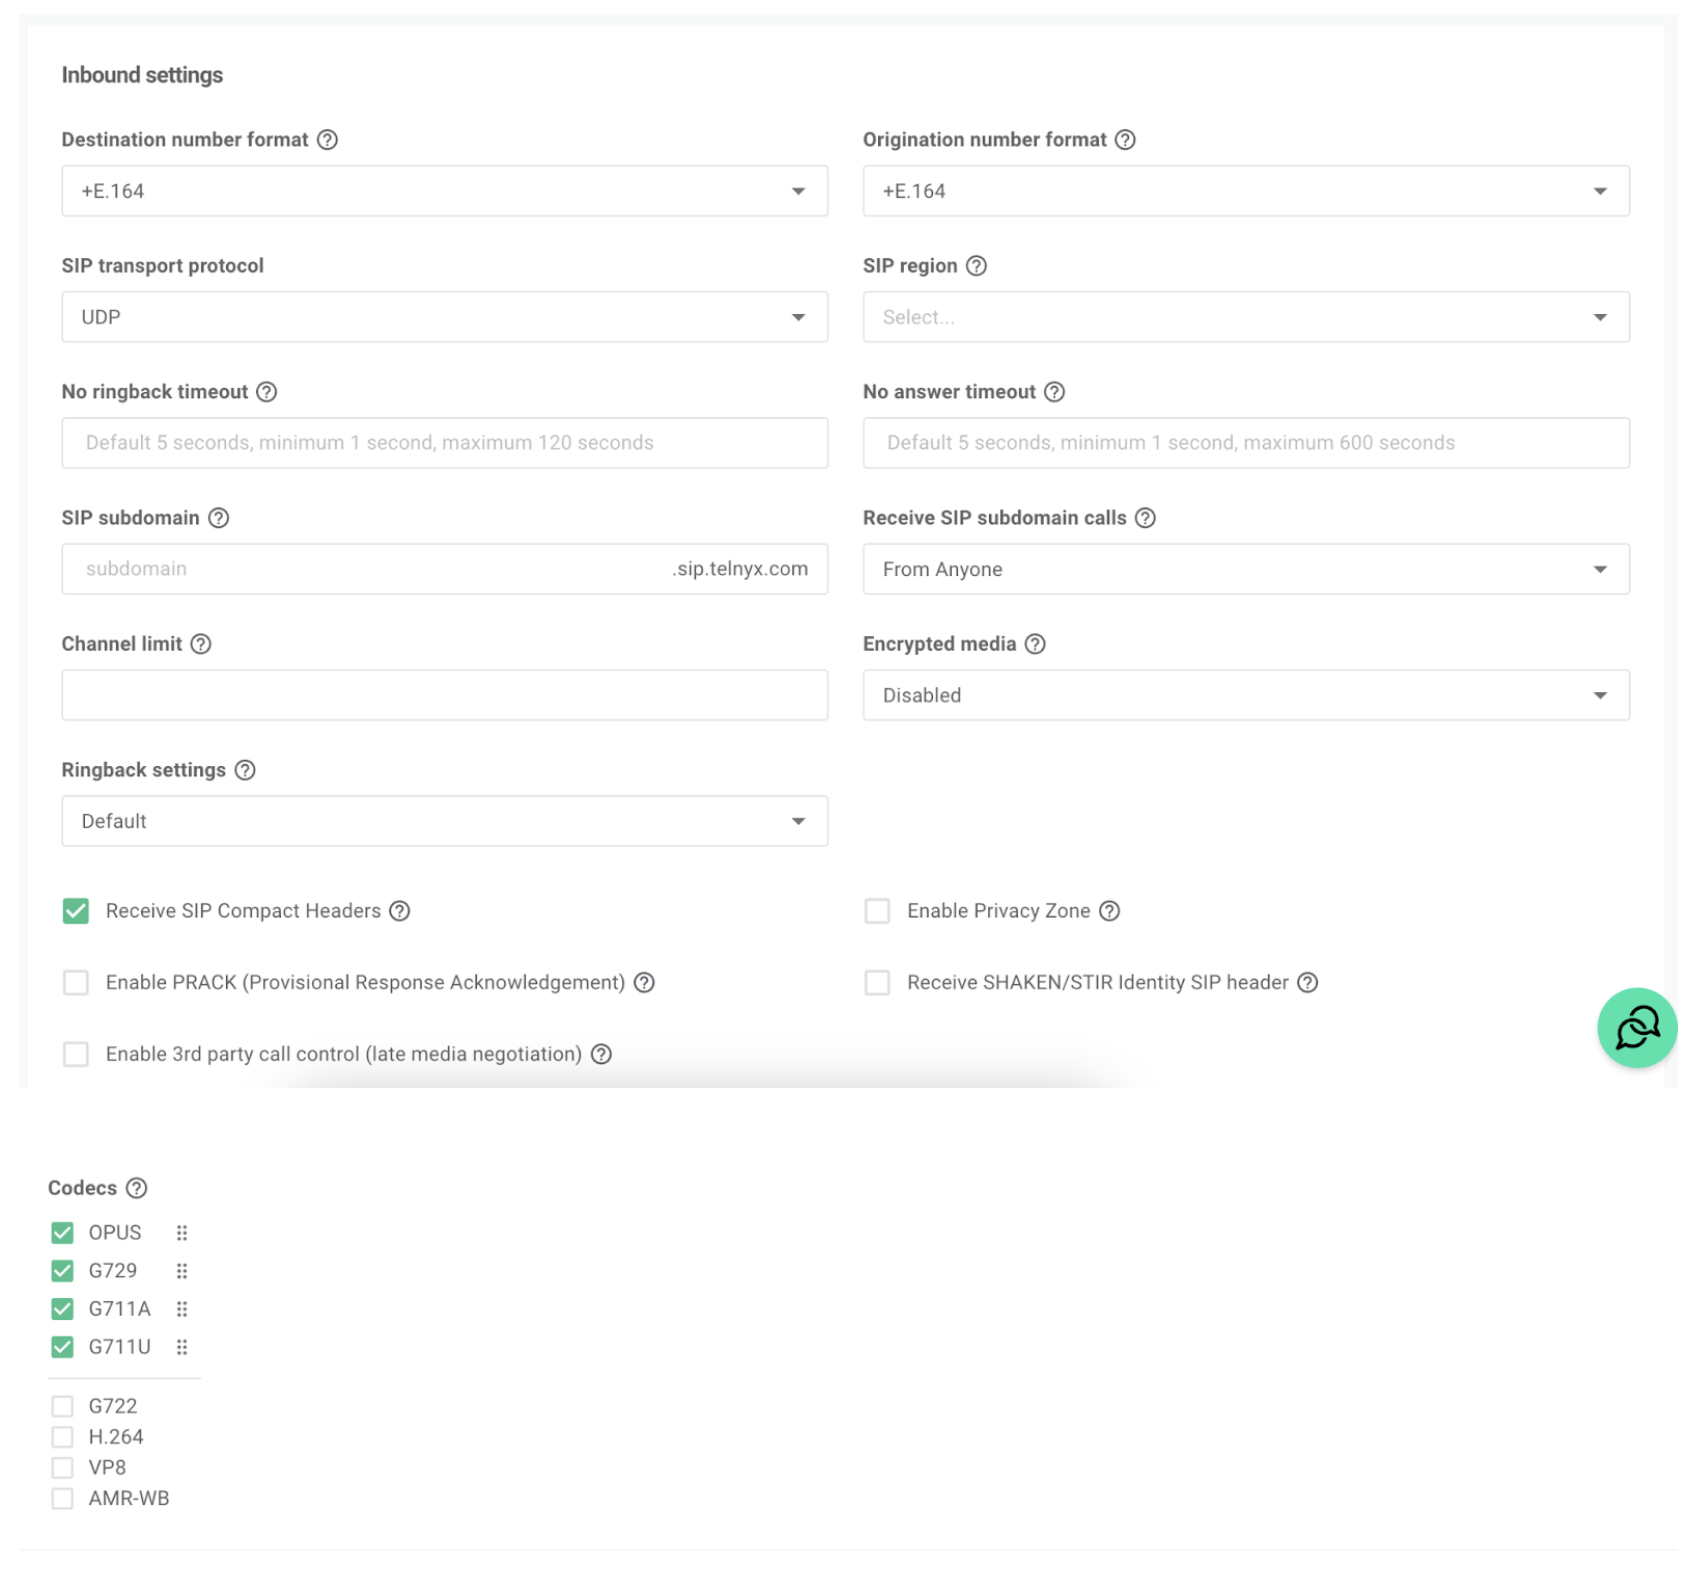
Configure inbound settings
- Navigate to the Inbound tab of your SIP trunk
- Configure settings as shown:
Configure SIP invite
- Go to Numbers, edit the number you’ll be using
- Navigate to Voice settings
- Scroll down to find “Translated Number”
- Set this value to match your Vapi SIP URI
You can get your Vapi SIP URI when you create a new SIP number through the Phone Numbers tab in the Vapi dashboard. The URI will look like:
sip:<your-unique-id>@sip.vapi.ai for US or sip:<your-unique-id>@sip.eu.vapi.ai for EU
This setting modifies the SIP Invite so invites are correctly routed to your Vapi SIP URI.
Configure Telnyx for outbound calls
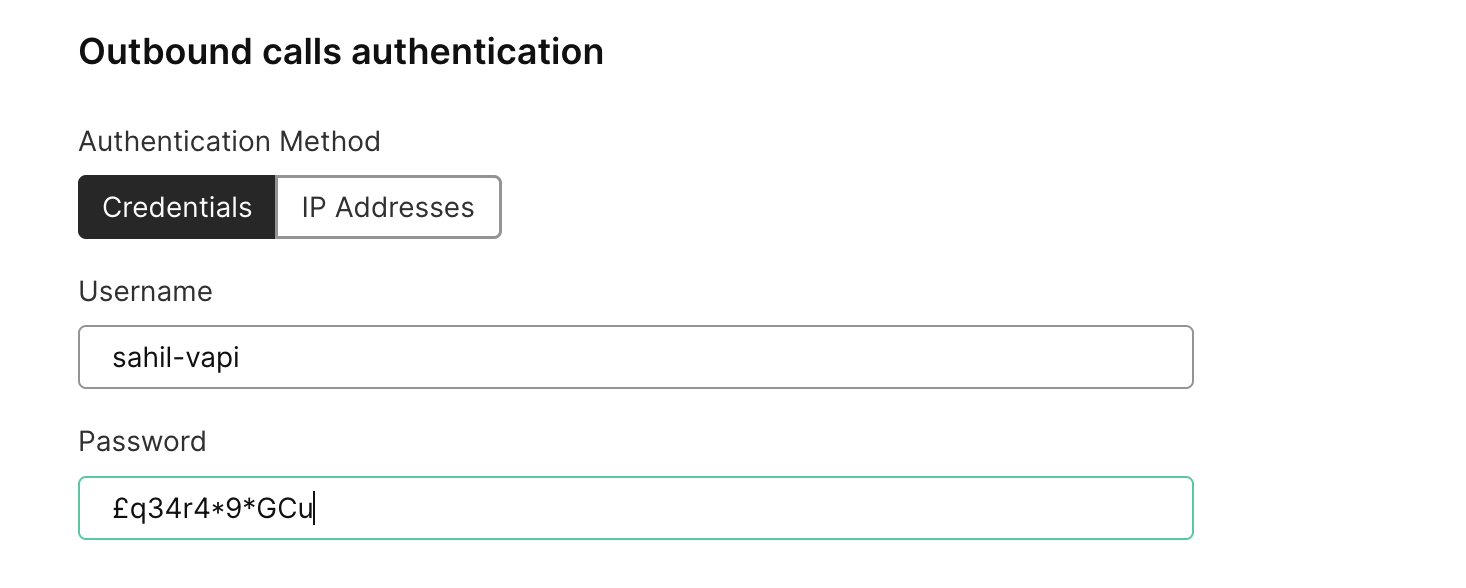
Set up outbound authentication
- Go to Voice / SIP Trunking / Authentication and routing
- Scroll down to “Outbound calls authentication”
- Create a new credential for Vapi to use
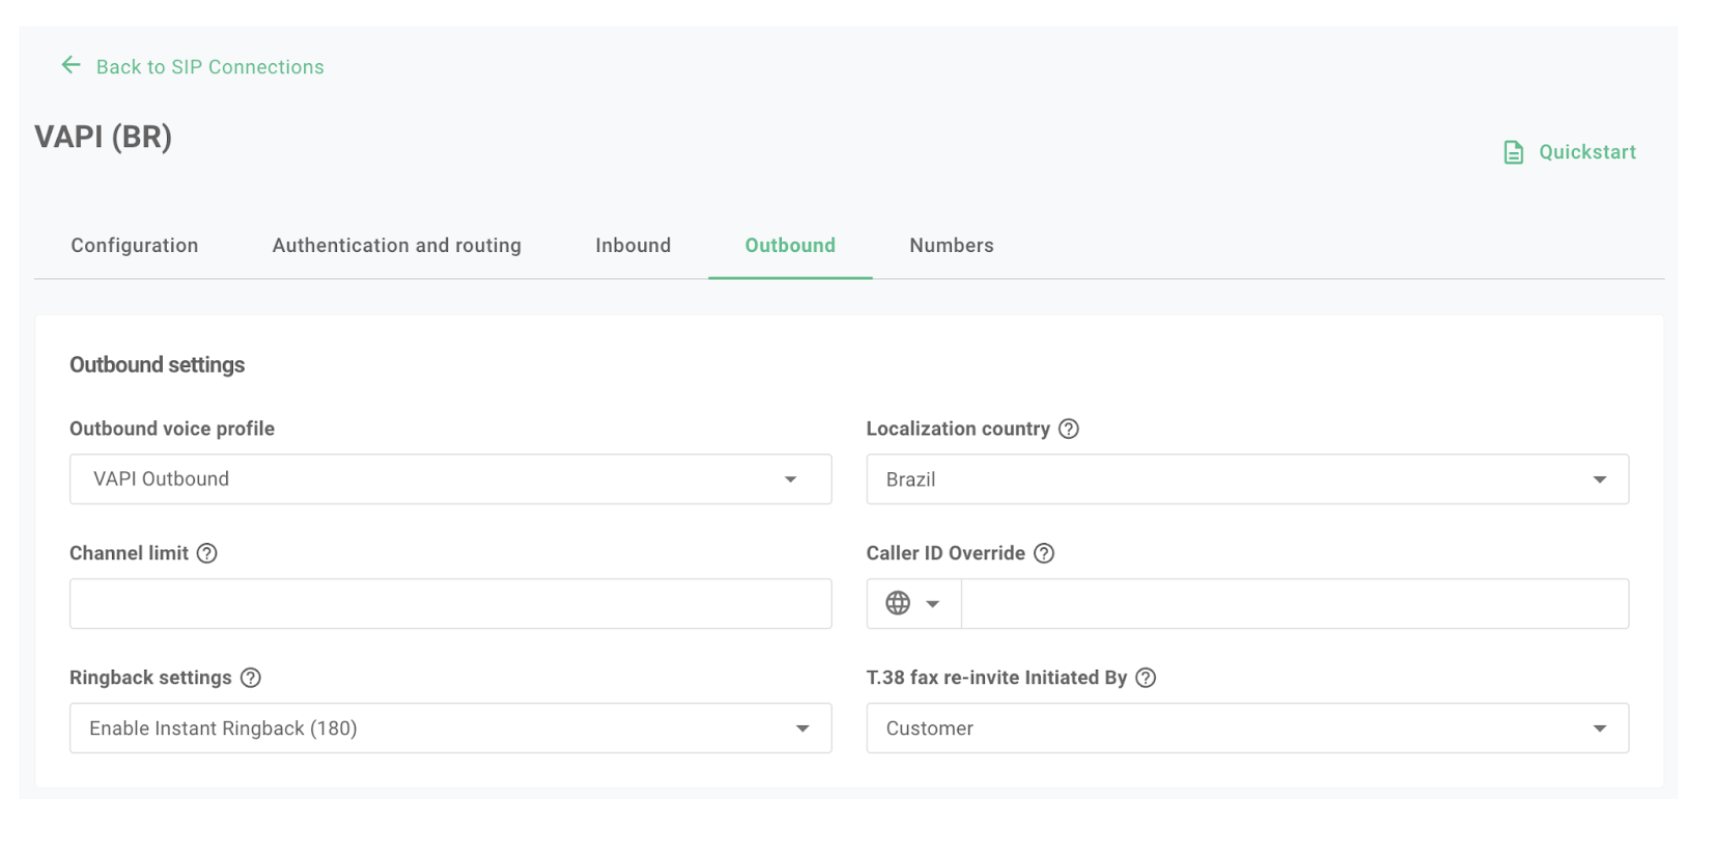
Create outbound voice profile
- Go to Voice / Outbound Voice Profiles
- Create a new profile
- Name it appropriately
- Configure desired destinations
- Leave default configuration settings
- Assign your SIP trunk
- Complete setup Alternatively, go to your SIP trunk / Outbound tab and select your newly created outbound voice profile.
Add your Telnyx SIP credentials to Vapi
Use the Vapi API to create a SIP trunk credential:
Use IP addresses in gateways. FQDNs like sip.telnyx.com return a 400 Bad Request.
Replace YOUR_VAPI_PRIVATE_KEY, YOUR_SIP_USERNAME, and YOUR_SIP_PASSWORD with your actual credentials.
Replace the gateway IPs with the Telnyx gateway IPs assigned to your trunk.
Set inboundEnabled to false if you only need outbound calls.
If successful, the response will include an id for the created credential, which you’ll use in the next step.
Add your phone number to Vapi
Associate your phone number with the SIP trunk in Vapi:
Replace YOUR_VAPI_PRIVATE_KEY, YOUR_PHONE_NUMBER, and YOUR_CREDENTIAL_ID with your actual details.
Assign your voice assistant to handle calls
- In your Vapi dashboard, go to the Build section and select Phone Numbers
- Click on your Telnyx Number
- In the Inbound Settings section, assign your voice assistant to handle incoming calls
- In the Outbound Form section, assign your voice assistant to handle outgoing calls
By following these steps, your Telnyx SIP trunk will be fully integrated with Vapi, allowing your AI voice assistants to manage calls effectively.