Plivo SIP Integration
Learn to connect your Plivo SIP trunk to Vapi for inbound and outbound calls
Overview
For a general introduction to SIP trunking with Vapi (concepts and architecture), see our SIP Trunking Guide.
This guide shows you how to connect your Plivo SIP trunk to your existing Vapi agents. It covers:
- Step-by-step configuration of Plivo and Vapi for SIP trunking (outbound and inbound)
- How to register and associate your Plivo phone numbers with Vapi
- How to make outbound calls using the Vapi API and dashboard
- How to assign Plivo numbers for inbound call routing through Vapi
Prerequisites
- A Plivo account
- Admin access to your Plivo and PBX/SIP trunk configuration
- A phone number you want to connect to Vapi via Plivo
Indian phone numbers cannot be used with Plivo on Vapi due to TRAI regulations. These regulations require SIP termination to occur via an Indian server, which Vapi does not currently support.
Get Started
Outbound (Vapi to user)
Inbound (user to Vapi)
Plivo Configuration
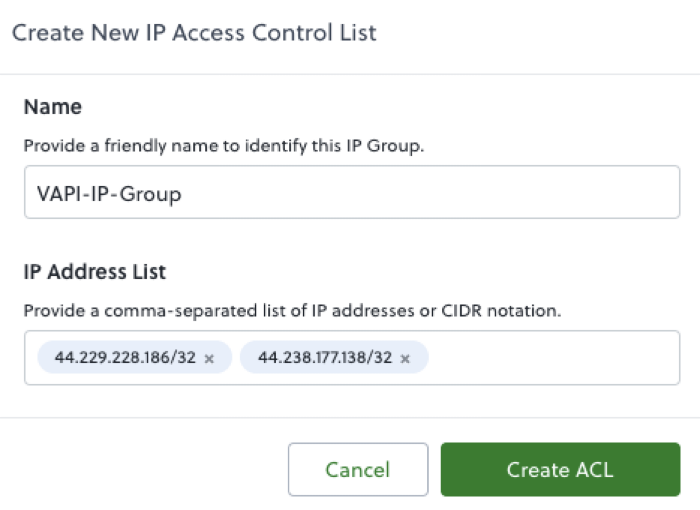
Create IP Access Control List
-
Navigate to:
Zentrunk (SIP) → Outbound Trunks → IP Access Control List → Create New IP Group -
Fill out the form:
- Name: Enter a descriptive name (for example,
VAPI-IP-Group). - IP Address List: Add each IP address for the Vapi region where your organization is hosted:
- Click Create ACL to save.
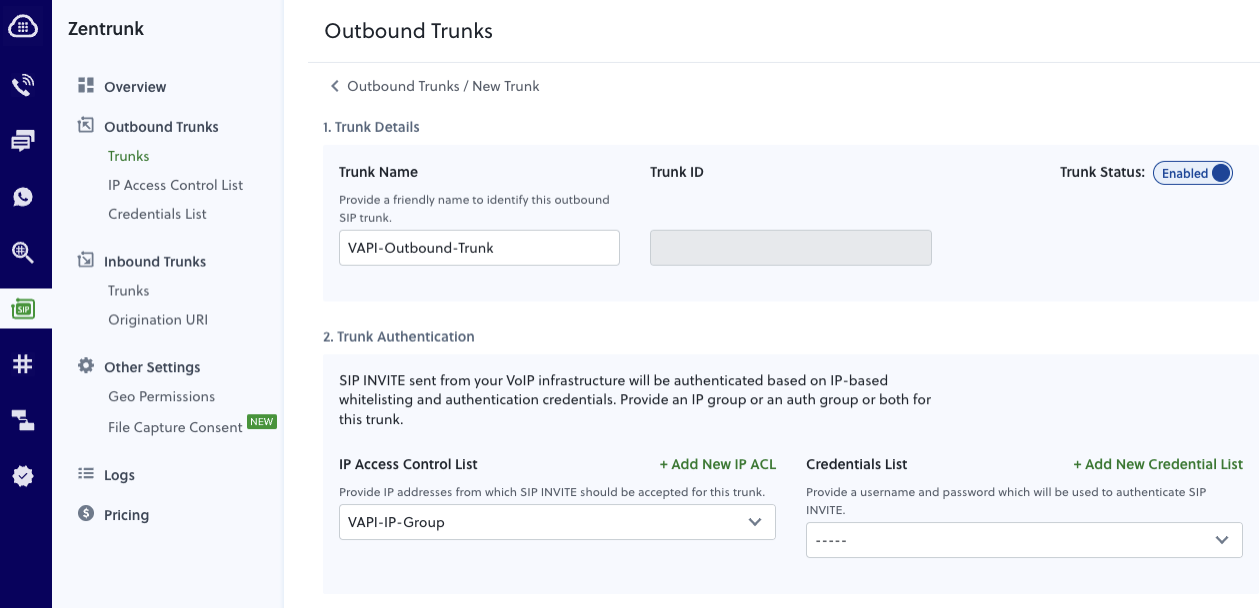
Create Outbound Trunk
-
Navigate to:
Zentrunk (SIP) → Outbound Trunks → Trunks → Create New Outbound Trunk -
Fill out the form:
- Trunk Name: Enter a descriptive name (for example,
Vapi-Outbound-Trunk). - IP Access Control List: Select the IP ACL created in the previous step.
- Click Create Trunk to save.

Vapi Configuration
Create a SIP Trunk Credential
- Copy the following API call.
- Replace
YOUR_PLIVO_TERMINATION_SIP_DOMAINwith your actual Plivo Termination SIP Domain (for example,12700668357XXXXXX.zt.plivo.com).
- You’ll receive a response like the one below. Note the
id(credentialId) for the next step.
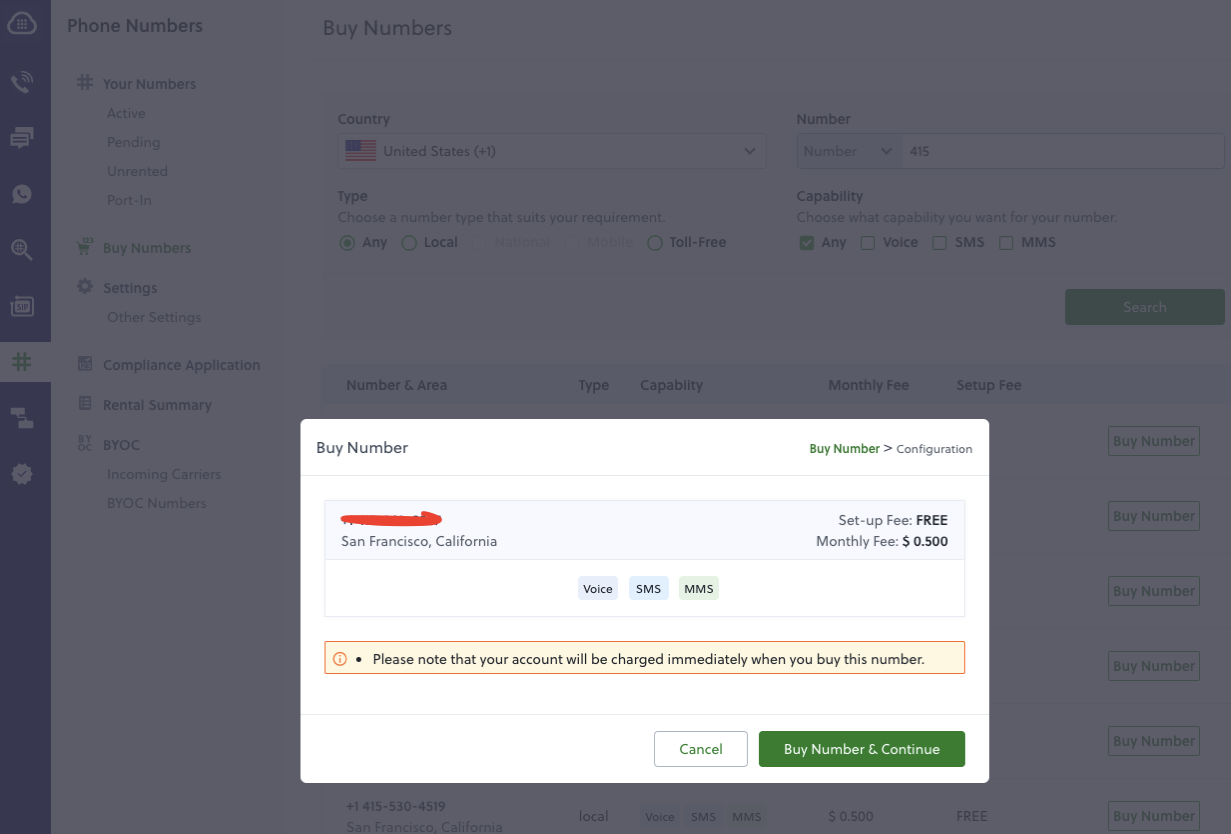
Register Your Phone Number
- Associate your Plivo number with the SIP trunk. Replace
YOUR_PLIVO_PHONE_NUMBERandYOUR_CREDENTIAL_IDwith the numbers from previous steps.
- Your response will look like this, note the phone number ID from the response for making calls.
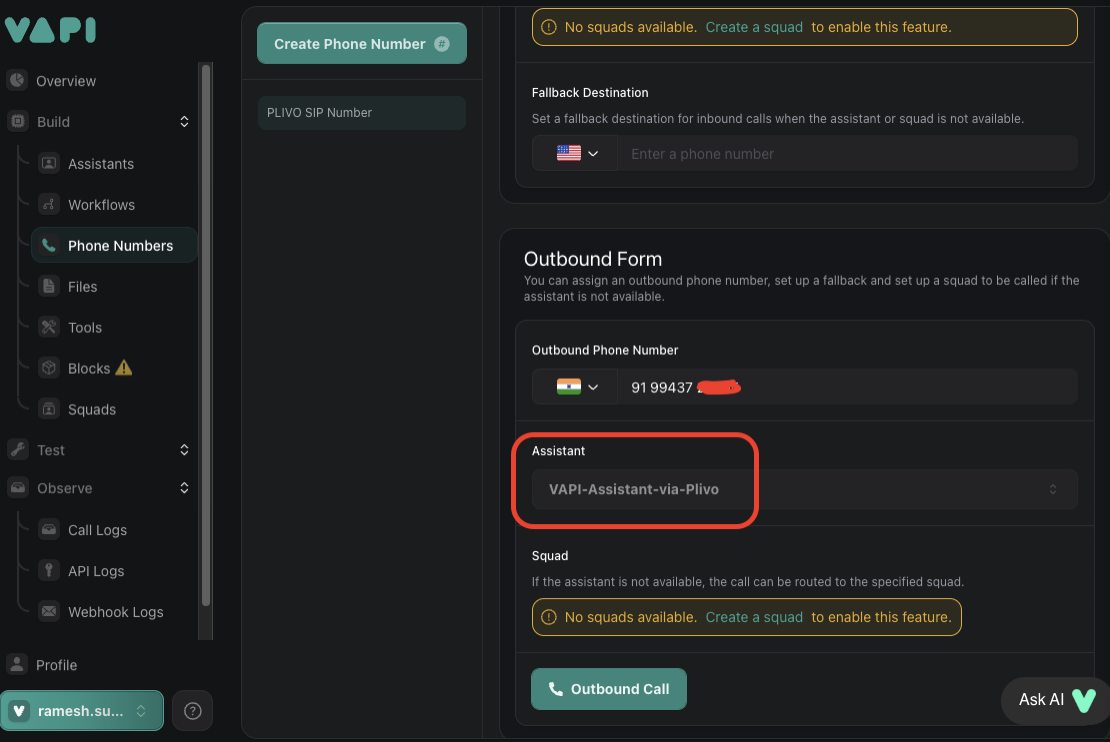
Create a Vapi Assistant
- Follow this guide to create an assistant
- Note your Assistant ID for making calls.
Errors
- Codec Support: Limit trunk codecs to G.711 µ‑law and A‑law only. Other codecs are not supported by Plivo SIP trunks.
- SIP REFER Not Supported: Plivo SIP trunks do not accept SIP REFER for call transfers.
- Origination URI Already Exists: This was previously an error on Plivo’s side and has been fixed.