Amazon Chime SDK SIP Integration
This guide walks you through setting up both outbound and inbound SIP trunking between Amazon Chime SDK and Vapi using a Voice Connector.
This is a Voice Connector-only integration — inbound and outbound calls work with no Lambda functions or custom logic required. Vapi handles the AI assistant entirely. This approach is best for straightforward AI assistants on a phone number where no additional integration is needed.
This integration does not support passing custom SIP headers, metadata, or enriched escalation data (e.g., human transfer with SIP header context). For those use cases, use a SIP Media Application with CallAndBridge instead.
Prerequisites
- An AWS account with access to the Amazon Chime SDK console
- A Vapi account with a private API key
- AWS CLI configured, or access to the Chime SDK console
- A phone number provisioned in Amazon Chime SDK (or the ability to order one)
- A Vapi assistant already created (for inbound calls)
Outbound calls (Chime SDK to Vapi)
Chime SDK configuration
Create a Voice Connector
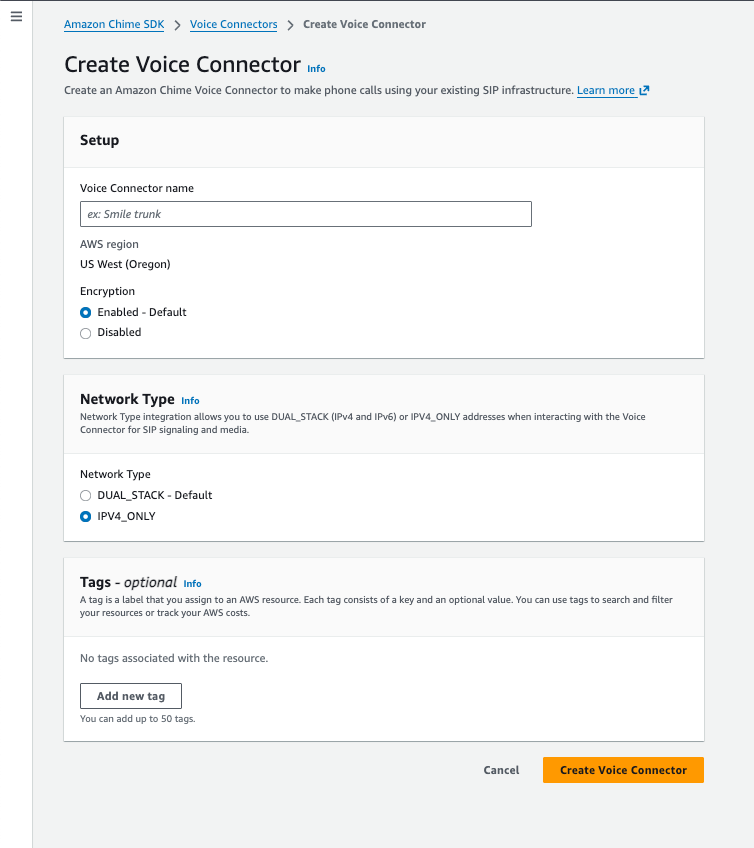
In the Amazon Chime SDK console, navigate to Voice Connectors and create a new one.
Configure the following settings:
- Encryption: Enabled (default)
- Network Type: IPV4_ONLY
Save the Outbound host name from the Voice Connector details — you need it when configuring the Vapi SIP trunk.
Enable termination and whitelist Vapi IPs
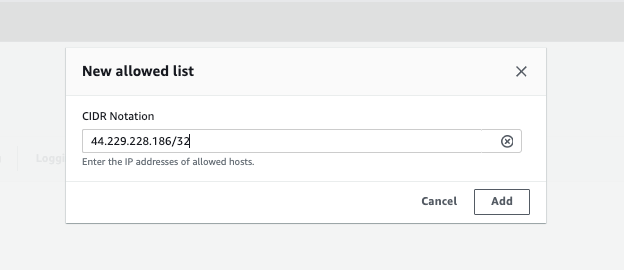
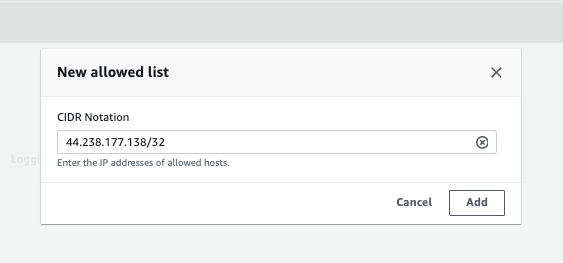
Navigate to the Termination tab of your Voice Connector and enable it.
Add Vapi’s static IP addresses for your Vapi region to the allowed host list:
Configure calling plan
In the Termination tab, scroll to the calling plan section and select the countries you want to allow outbound calls to.
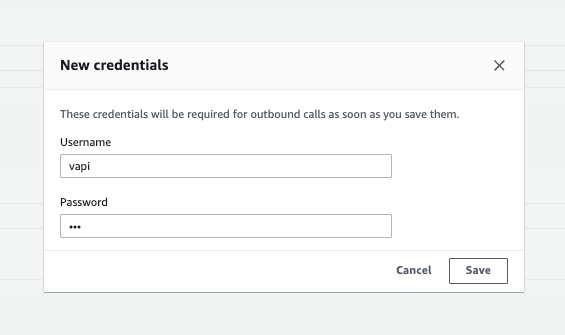
Create credentials
Still in the Termination tab, create a new credential with a username and password. Save these credentials — you need them for the Vapi SIP trunk configuration.
Assign phone numbers
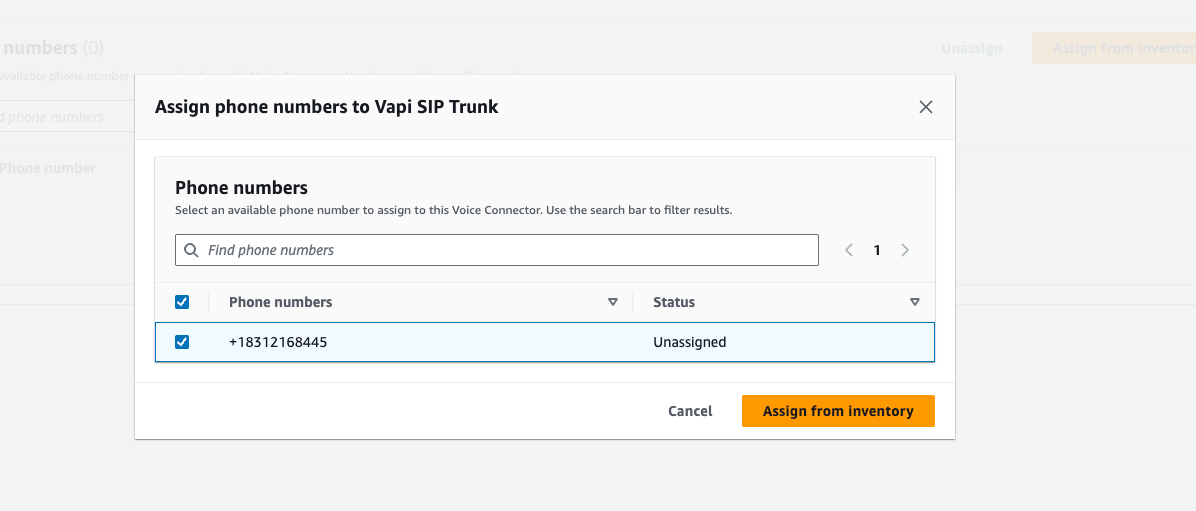
Navigate to the Phone numbers tab and click Assign from inventory to attach a phone number to this Voice Connector.
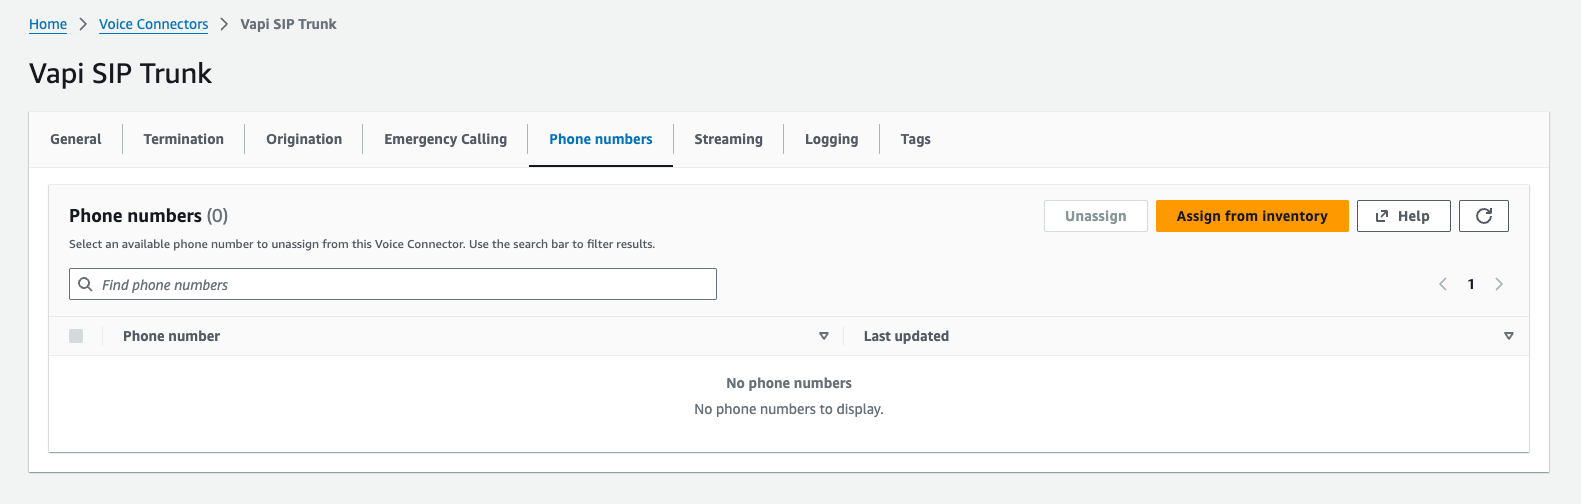
Select the phone number you want to assign and confirm.
If you don’t have any phone numbers in your inventory, order them from Amazon Chime SDK → Phone Number Management → Orders → Provision Phone Numbers.
Vapi configuration
Retrieve your Vapi API key
Log in to your Vapi dashboard and retrieve your API key from the Organization Settings.
Create a SIP trunk credential
Use the following API call to create a SIP trunk credential. Replace the placeholders with your Chime SDK Voice Connector details:
Note the id (credential ID) from the response for the next step.
The outboundProtocol must be set to tls/srtp when encryption is enabled on the Voice Connector (the default).
Inbound calls (Chime SDK to Vapi)
For inbound calls, a caller dials your Chime SDK phone number. The Voice Connector routes the call to Vapi through its origination settings — no Lambda or SIP Media Application required:
Vapi configuration
Create a SIP trunk credential
Vapi needs to know which IP addresses are allowed to send SIP traffic to it. Since the Voice Connector originates calls from its regional signaling IPs, you must register those IPs as a BYO SIP trunk credential in Vapi.
Look up the SIP signaling subnet for your Voice Connector’s region from the Chime SDK Voice Connector network configuration docs.
Create the credential via the Vapi API:
Replace the ip and netmask with the values for your Voice Connector’s region. For example:
- US West (Oregon):
99.77.253.0with netmask24 - US East (N. Virginia):
3.80.16.0with netmask23
Set outboundProtocol to tls/srtp if your Voice Connector has encryption enabled (the default), or udp if not.
Save the returned id — this is your Credential ID used in the following steps.
Register a phone number and assign your assistant
Register your Chime SDK phone number in Vapi, linking it to the credential and your assistant:
The number field must exactly match the E.164 phone number assigned to your Voice Connector (e.g., +18312168445). Inbound calls will fail to route if the numbers don’t match.
Chime SDK configuration
Configure origination on the Voice Connector
Navigate to your Voice Connector’s Origination tab and set Origination status to Enabled.
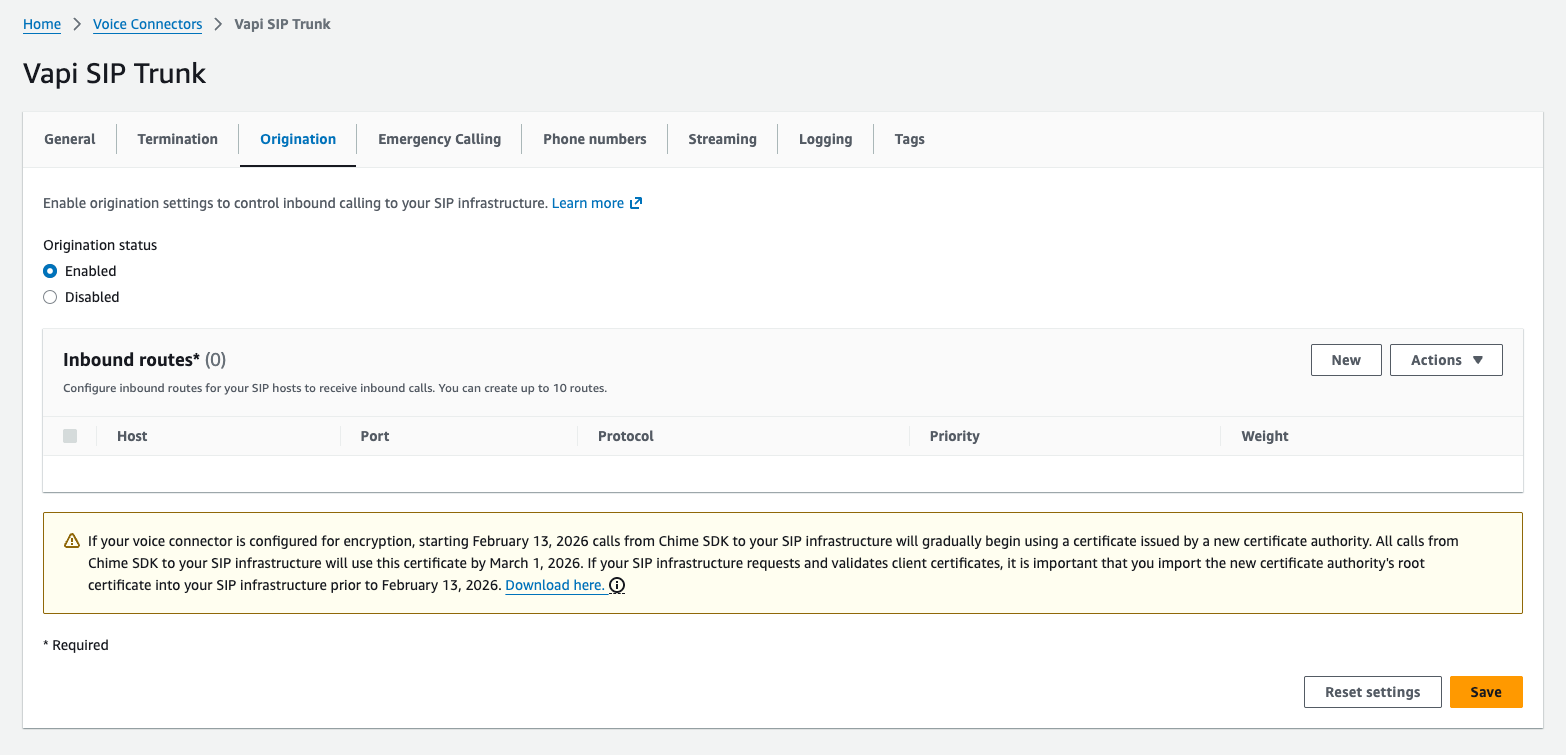
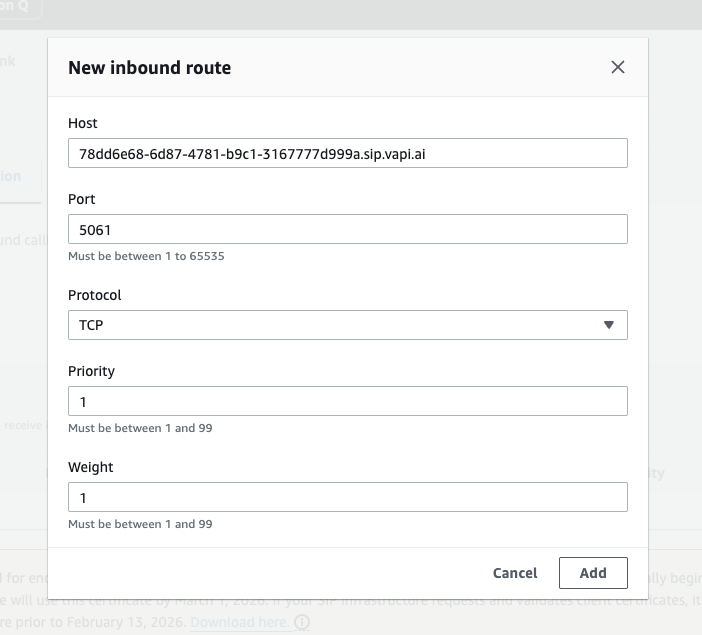
Click New to add an inbound route pointing to Vapi’s SIP server for your region:
- Host (US):
YOUR_CREDENTIAL_ID.sip.vapi.ai - Host (EU):
YOUR_CREDENTIAL_ID.sip.eu.vapi.ai - Port:
5061(for encrypted connections) - Protocol: TCP
Test the integration
Call your Chime SDK phone number from any phone. The call routes through the Voice Connector’s origination settings to your regional Vapi SIP host, where your Vapi assistant answers.
To debug issues, enable SIP logging on the Voice Connector (under the Logging tab) for detailed SIP message traces.
Next steps
Now that you have Amazon Chime SDK SIP trunking configured:
- SIP trunking overview: Learn more about SIP trunk concepts and configuration options.
- Networking and firewall: Review network requirements and firewall rules.
- Troubleshoot SIP trunk credential errors: Debug common SIP integration issues.