

API keys
Never expose a private API key in browser or mobile app code, logs, screenshots, a source-code repository, or paste it in an agent chat. Store private keys in a server-side secret manager or environment variable.
A Vapi API key is a credential that authorizes an application to access your Vapi organization. Use a public API key for supported client-side integrations and a private API key for server-side requests.
This guide covers API keys issued by Vapi. To connect accounts from model, voice, transcriber, and telephony providers, see Provider keys.
If you’re setting up API access with an AI coding assistant, the setup-api-key skill guides you through obtaining and configuring a Vapi API key.
How it works
Every API key belongs to one Vapi organization. Choose the key type based on where your application runs, then limit a public key to the origins and assistants that need access.
Only public keys support allowed origins and allowed assistants. A private key can access everything in your organization, so store it server-side and delete it if it is exposed.
Prerequisites
- A Vapi account
- Access to API Keys for your Vapi organization
Create an API key
Open API Keys
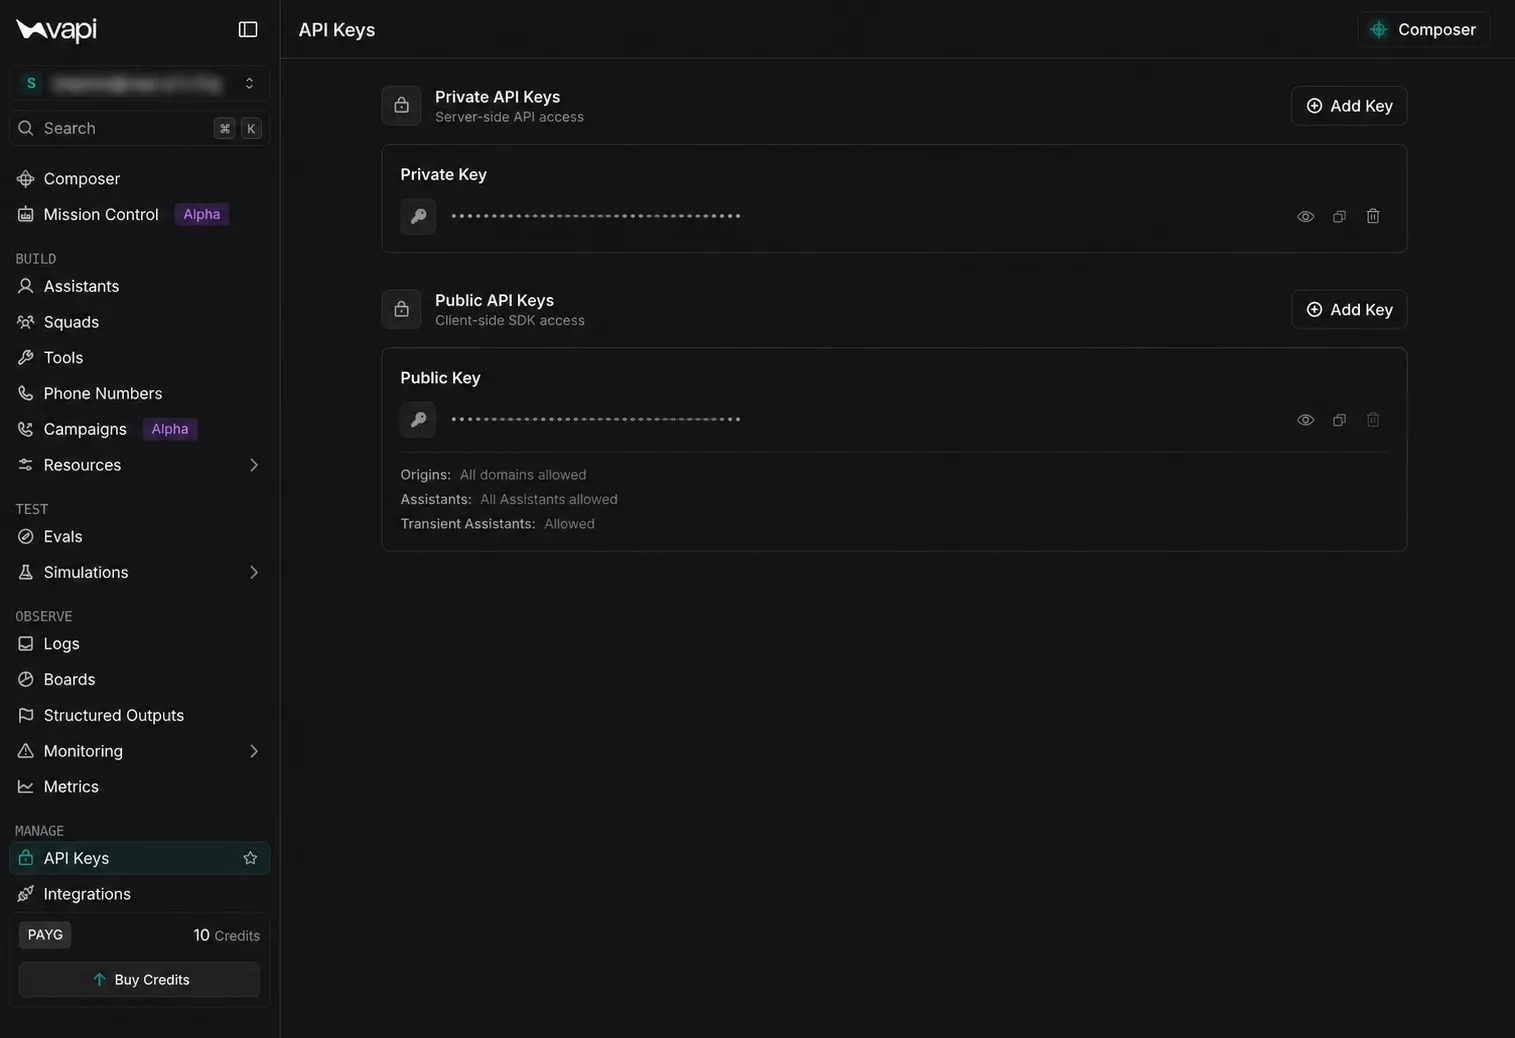
Open the Dashboard, then select API Keys.
Choose a key type
Choose Private API Keys for server-side access or Public API Keys for client-side SDK access.
Restrict access
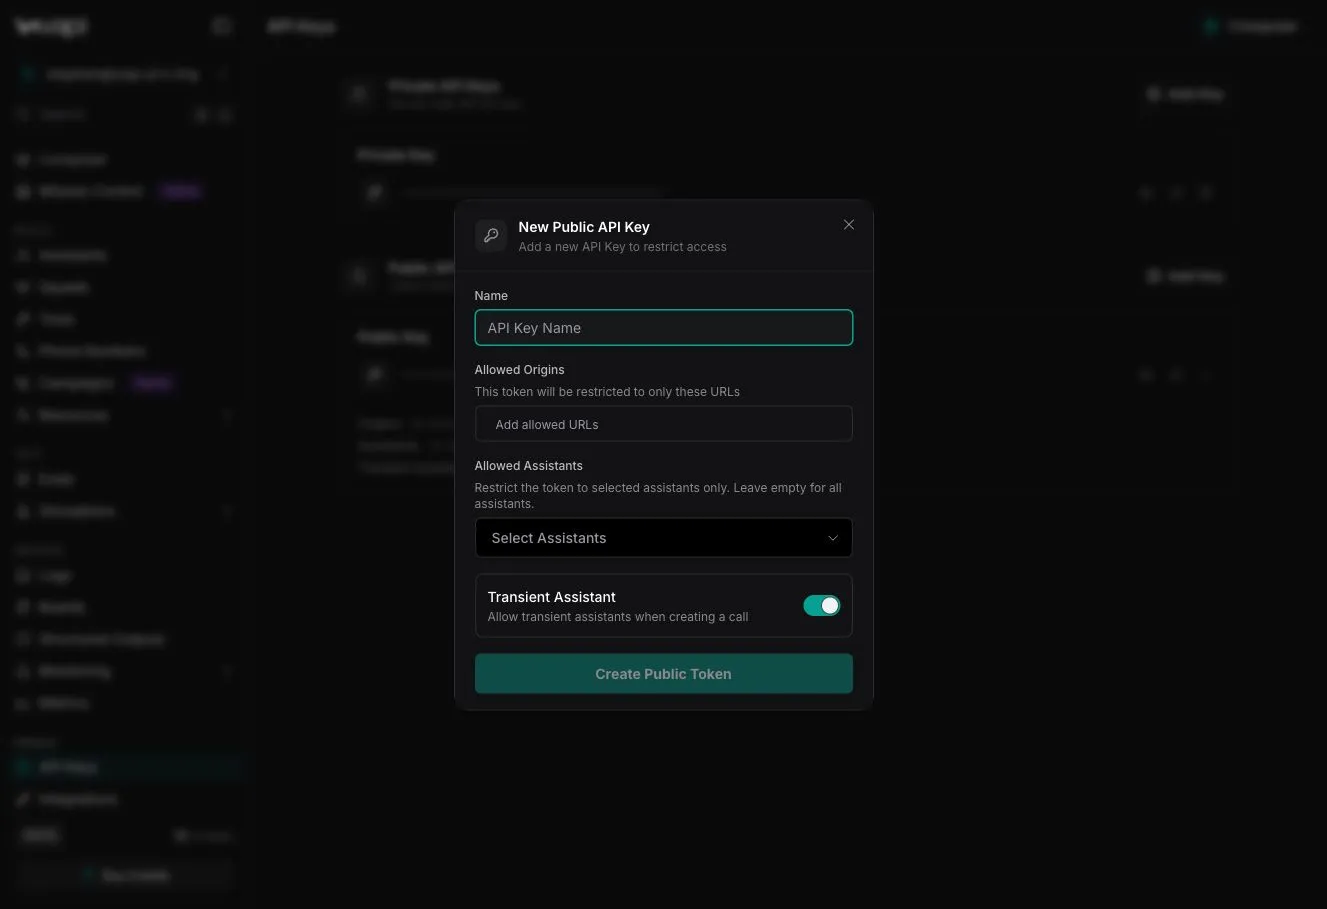
For a public key, enter the origins that may use the key in Allowed Origins. In Allowed Assistants, select the assistants the key may access. Enable Transient Assistant only when the application needs to create calls with transient assistants.
For example, add https://app.example.com for a production web application.
Allowed origins follow these rules:
- Enter each origin as a scheme, host, and optional port. Any path is ignored.
- The scheme, host, and port must match the
Originheader the browser sends. - Use
*in place of one whole subdomain label, one dot-separated part of the host. For example,https://*.example.commatcheshttps://app.example.combut nothttps://example.comorhttps://a.b.example.com. - Partial wildcards, such as
https://myapp-*.example.com, never match. - If you set no allowed origins, the key works from any origin.
Use separate keys for development, staging, and production. Give each key only the access its application needs.
View or copy a key
Open the Dashboard, then select API Keys. Find the key under Private API Keys or Public API Keys.
- Select the eye icon next to the masked key value to view the key.
- Select the copy icon next to the masked key value to copy the key.
Use a public API key
Pass a public API key to the Vapi Web SDK to start a browser-based voice call with an assistant:
Replace YOUR_PUBLIC_API_KEY and YOUR_ASSISTANT_ID with values from your Vapi organization.
Public API keys are visible in client-side code. Restrict them to the required origins and assistants. For short-lived or user-specific access, use JWT authentication.
Restricting a public key to specific assistants does not stop callers from sending assistantOverrides for those assistants. Do not rely on a public key to protect the system prompt or server settings of an allowed assistant.
Test a private API key
Send a private API key in the Authorization header as a bearer token. This request only lists the assistants in your organization and does not modify them:
Replace YOUR_PRIVATE_API_KEY with your private API key. Do not add the real value to a script or commit it to version control.
Find your organization ID
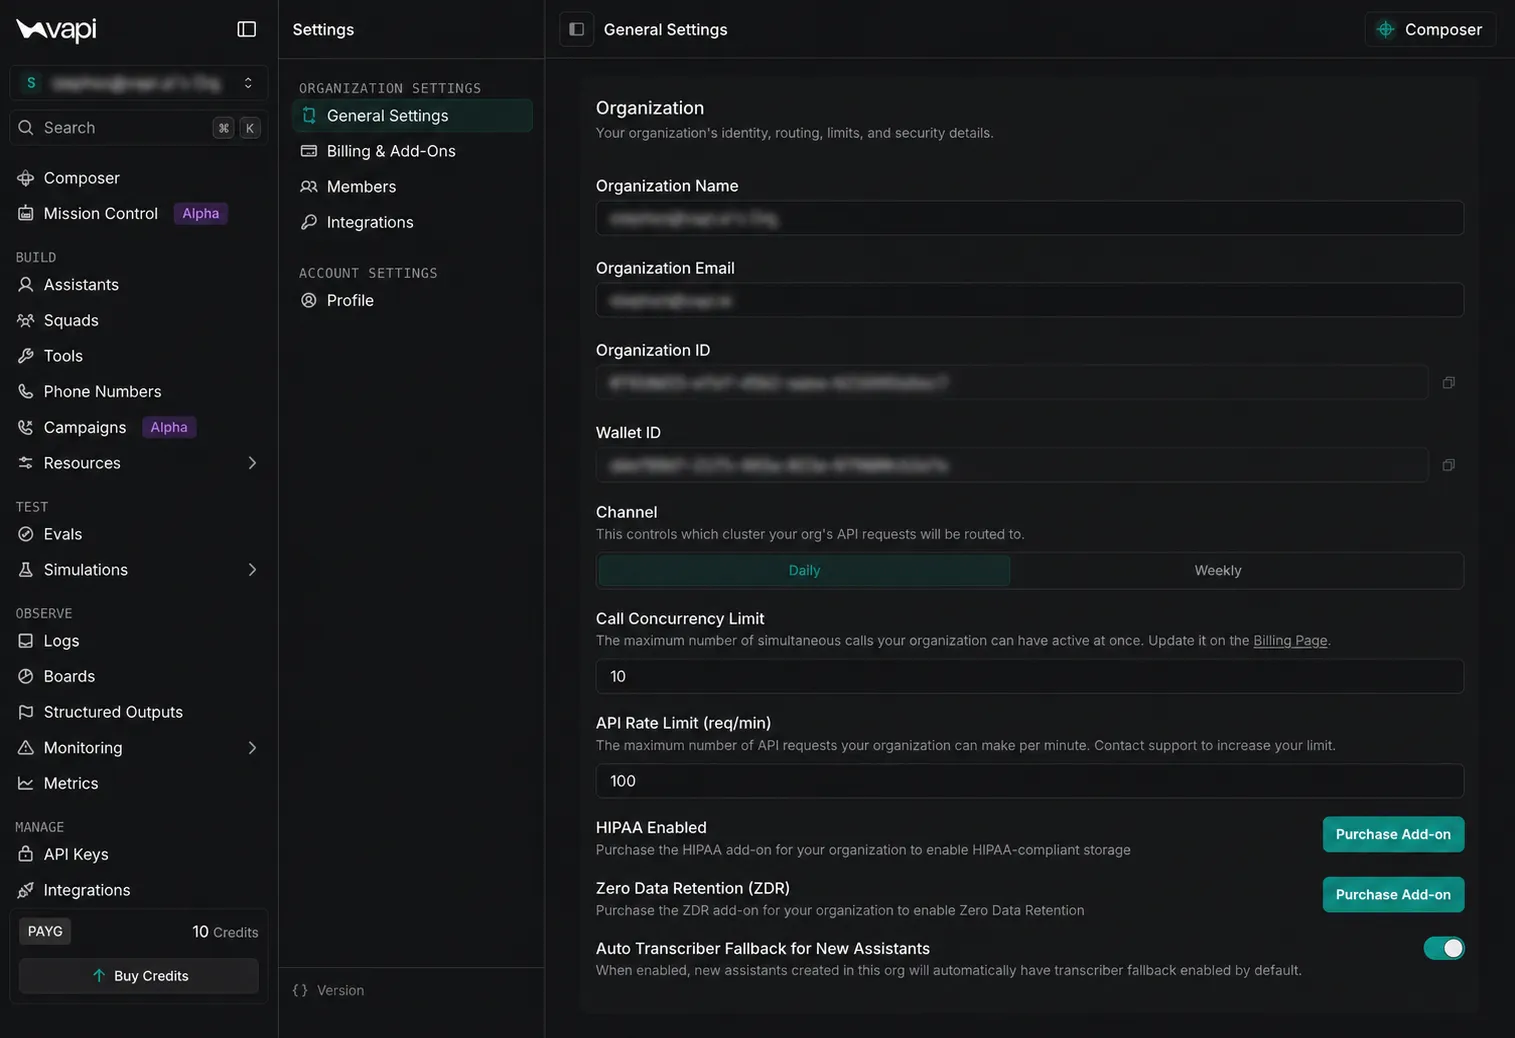
Some integrations require your organization ID in addition to an API key.
Open General Settings
Open the Dashboard. Select your organization name in the upper-left corner, then select Settings.
Under Organization Settings, select General Settings.
Verify it works
Run the list-assistants request with a private API key. A successful request returns a JSON list containing the assistant you created. A 401 response means the key is missing, invalid, or unavailable to the organization making the request.
Confirm that the new key also appears under Private API Keys or Public API Keys in the Dashboard.