

Set up the Transfer Call tool
Create a transfer call tool, give it destinations and messages, and add it to an assistant. For how transfers behave, which mode to choose, and what happens when a transfer fails, see the Transfer Call tool overview.
Prerequisites
Before you create the tool, prepare:
- A Vapi assistant that handles phone calls
- A reachable destination phone number in E.164 format, for example,
+14155550100, or a valid SIP URI - A private Vapi API key for the curl method
Configure the transfer call tool
Create a reusable transfer call tool, define its destinations, and add it to an assistant.
Dashboard
curl
Create the tool
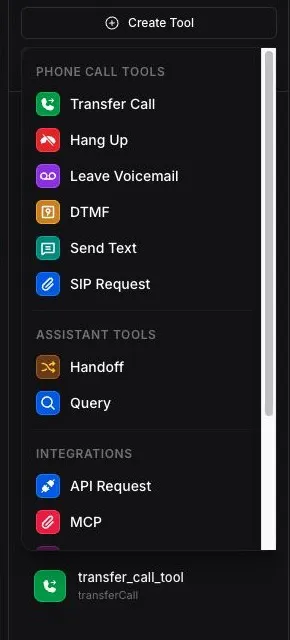
Open Tools in the Vapi Dashboard, click Create Tool, and select Transfer Call.
Describe when to transfer
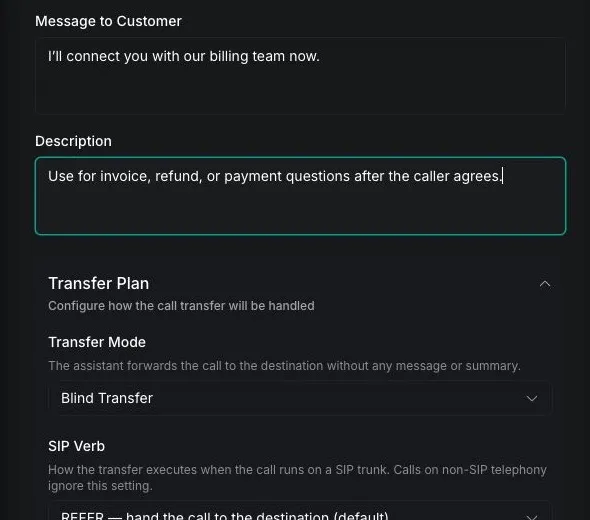
Under Tool Settings, enter a clear Tool Name and Description. Describe the conditions that should trigger a transfer so the assistant can choose the tool reliably.
For example:
Add a destination
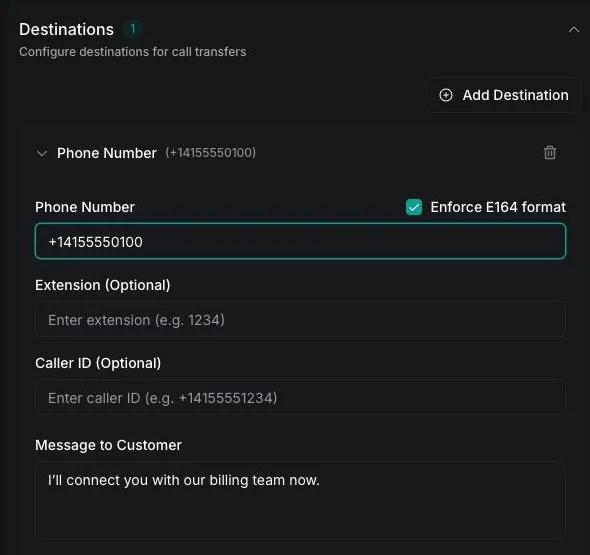
Under Destinations, click Add Destination, then select Phone Number or SIP. Enter the destination and a specific description of when the assistant should use it.
For a phone number, use E.164 format, including the + prefix and country code. If you add multiple destinations, give each one a distinct description so the assistant can route the caller correctly.
Configure the transfer message
Optionally enter a message for the assistant to say before the transfer. By default, the assistant says Transferring the call now. A message can be at most 1,000 characters. To choose which message plays or to transfer silently, see Configure transfer messages.
Choose the transfer mode
Expand Transfer Plan to choose how this destination receives the call. Leave Blind transfer selected for an immediate transfer, or see Choose a transfer mode to compare the modes.
- Blind transfer
- Blind transfer with summary in SIP header
- Warm transfer with message
- Warm transfer with summary
- Warm transfer with TwiML
- Warm transfer - wait for operator, then say message
- Warm transfer - wait for operator, then say summary
- Warm transfer - experimental
Publish the tool
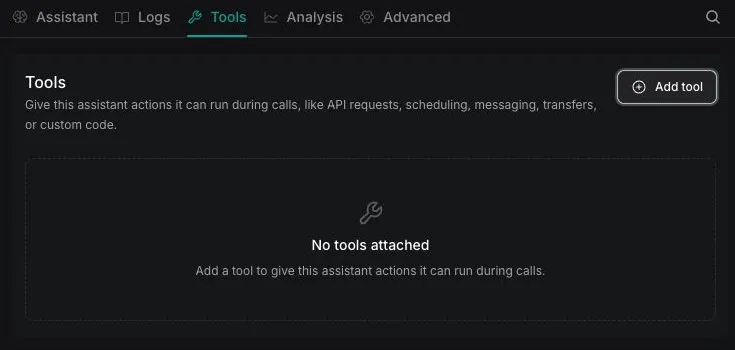
Select Publish in the tool header. Review the changes, then select Next. Enter a Version Name and, optionally, a Description. Select Publish to make the tool version current.
Choose a destination
Use the destination type that matches the system receiving the call.
For a phone-number destination that uses an extension, set extension instead of adding the extension to number. Vapi dials the extension after the destination answers.
A destination’s description tells the assistant when to select it. Keep each description specific to a routing intent, for example, billing, sales, or technical support.
To choose among stored destinations based on an API lookup, follow Transfer calls using API Request and Transfer Call tools. To select or construct a destination at runtime instead of storing it on the tool, follow Dynamic call transfers.
Route to multiple destinations
A single transfer call tool can contain multiple phone-number destinations, SIP destinations, or a mix of both. When the assistant invokes the tool, it uses the conversation and each destination’s description to select one destination; it does not call every destination in the array.
In the Dashboard, click Add Destination for each route. Give every destination a distinct description, then add matching routing rules to the assistant’s system prompt. For example:
With the API, add one object for each route to destinations. Each object can have its own message and transfer plan. When updating a tool, include every destination that should remain because the new destinations array replaces the existing array.
To move the conversation to another Vapi assistant, use the handoff tool instead of a phone or SIP transfer. Handoff works between standalone assistants and between assistants in a Squad, and can carry conversation context into the destination assistant.
Configure transfer messages
The assistant says one message before the transfer starts. By default, the message is Transferring the call now, spoken in the transcriber’s language. Setting the tool’s messages array to any value, including an array with only a request-failed message, removes this default.
Vapi picks the message in this order:
Only one of these plays, and it finishes before the transfer starts.
Transfer without a message
To transfer silently, set the destination’s message to an empty string. This works for destinations stored on the tool. A destination your server returns in response to transfer-destination-request can’t use an empty message to make the transfer silent.
Respond when your server refuses a transfer
When your server responds to transfer-destination-request with an error instead of a destination, the transfer doesn’t happen. Add a request-failed message to the tool’s messages so the caller hears what happened:
With role set to system, the model reads the content as an instruction and explains the refusal in its own words. With the default assistant role, the assistant speaks the content as written. If the tool has no request-failed message, the caller hears the default Transferring the call now and then no transfer happens.
The request-response-delayed message type doesn’t apply to transfers. To avoid silence while your server chooses a destination, respond quickly or store the destinations on the tool.
Verify the transfer
Place a test call and ask for the destination described in the tool. Confirm that the call log contains a transferCall tool invocation and that the destination rings or answers.
The assistant-forwarded-call ended reason confirms that Vapi initiated or delegated the transfer. It does not confirm that the downstream telephony provider completed it, so check the provider’s call logs when the destination does not receive the call.
If the transfer doesn’t behave as expected, see Troubleshoot call transfers.
API reference
The Create Tool API reference documents the public transfer call fields, destination types, transfer plans, messages, and rejection settings. The Update Assistant API reference documents how to assign reusable tools with model.toolIds.